Page Layout
The Request grid is more than just a list of tasks. Here, you can see all your assignments in one clear view, understand their current progress, and act on them without unnecessary steps. The layout is designed to keep you focused, reduce the time spent searching for information, and help you make decisions more quickly.
Every part of the page has a specific purpose: the navigation tells you exactly where you are, the filter panel lets you narrow the view to what matters most, and the request list shows the details you need to take action. Together, these elements create a workspace that adapts to your role and supports both quick daily tasks and more complex reviews.
In the following sections, you’ll learn how to use these elements effectively—whether you’re approving invoices, tracking project progress, or reviewing company-wide requests.

Navigation
At the top of the page, you’ll find a navigation bar, also known as a breadcrumb, that helps you understand your current location within the system. It shows the full path from the main view down to the specific object you’re working with.

The structure follows this pattern: View > Company > Object type > Object
What each part represents:
- View – defines the context you’re working in: active tasks, full history, or watched items. You can switch between three views: Active, All, and Following.
- Company – the highest organizational level in Xeelo, representing a specific domain or area of work.
- Object type – categorizes requests based on their nature (e.g., Orders, Invoices, Contracts), helping maintain structure within each company.
- Object – a dedicated workspace showing requests of a specific type. Each object can have its layout, rules, and workflow.
This navigation allows you to quickly identify your current location and easily return to a broader context.
Create Button
In the top-right corner, you’ll find the Create button, used to add a new request. Its behavior depends on your current context and the configuration set by the administrator.

Creating within a specific object
If you’re inside a specific object, clicking Create usually opens the default form for that request type. The form includes all necessary fields configured for the object.
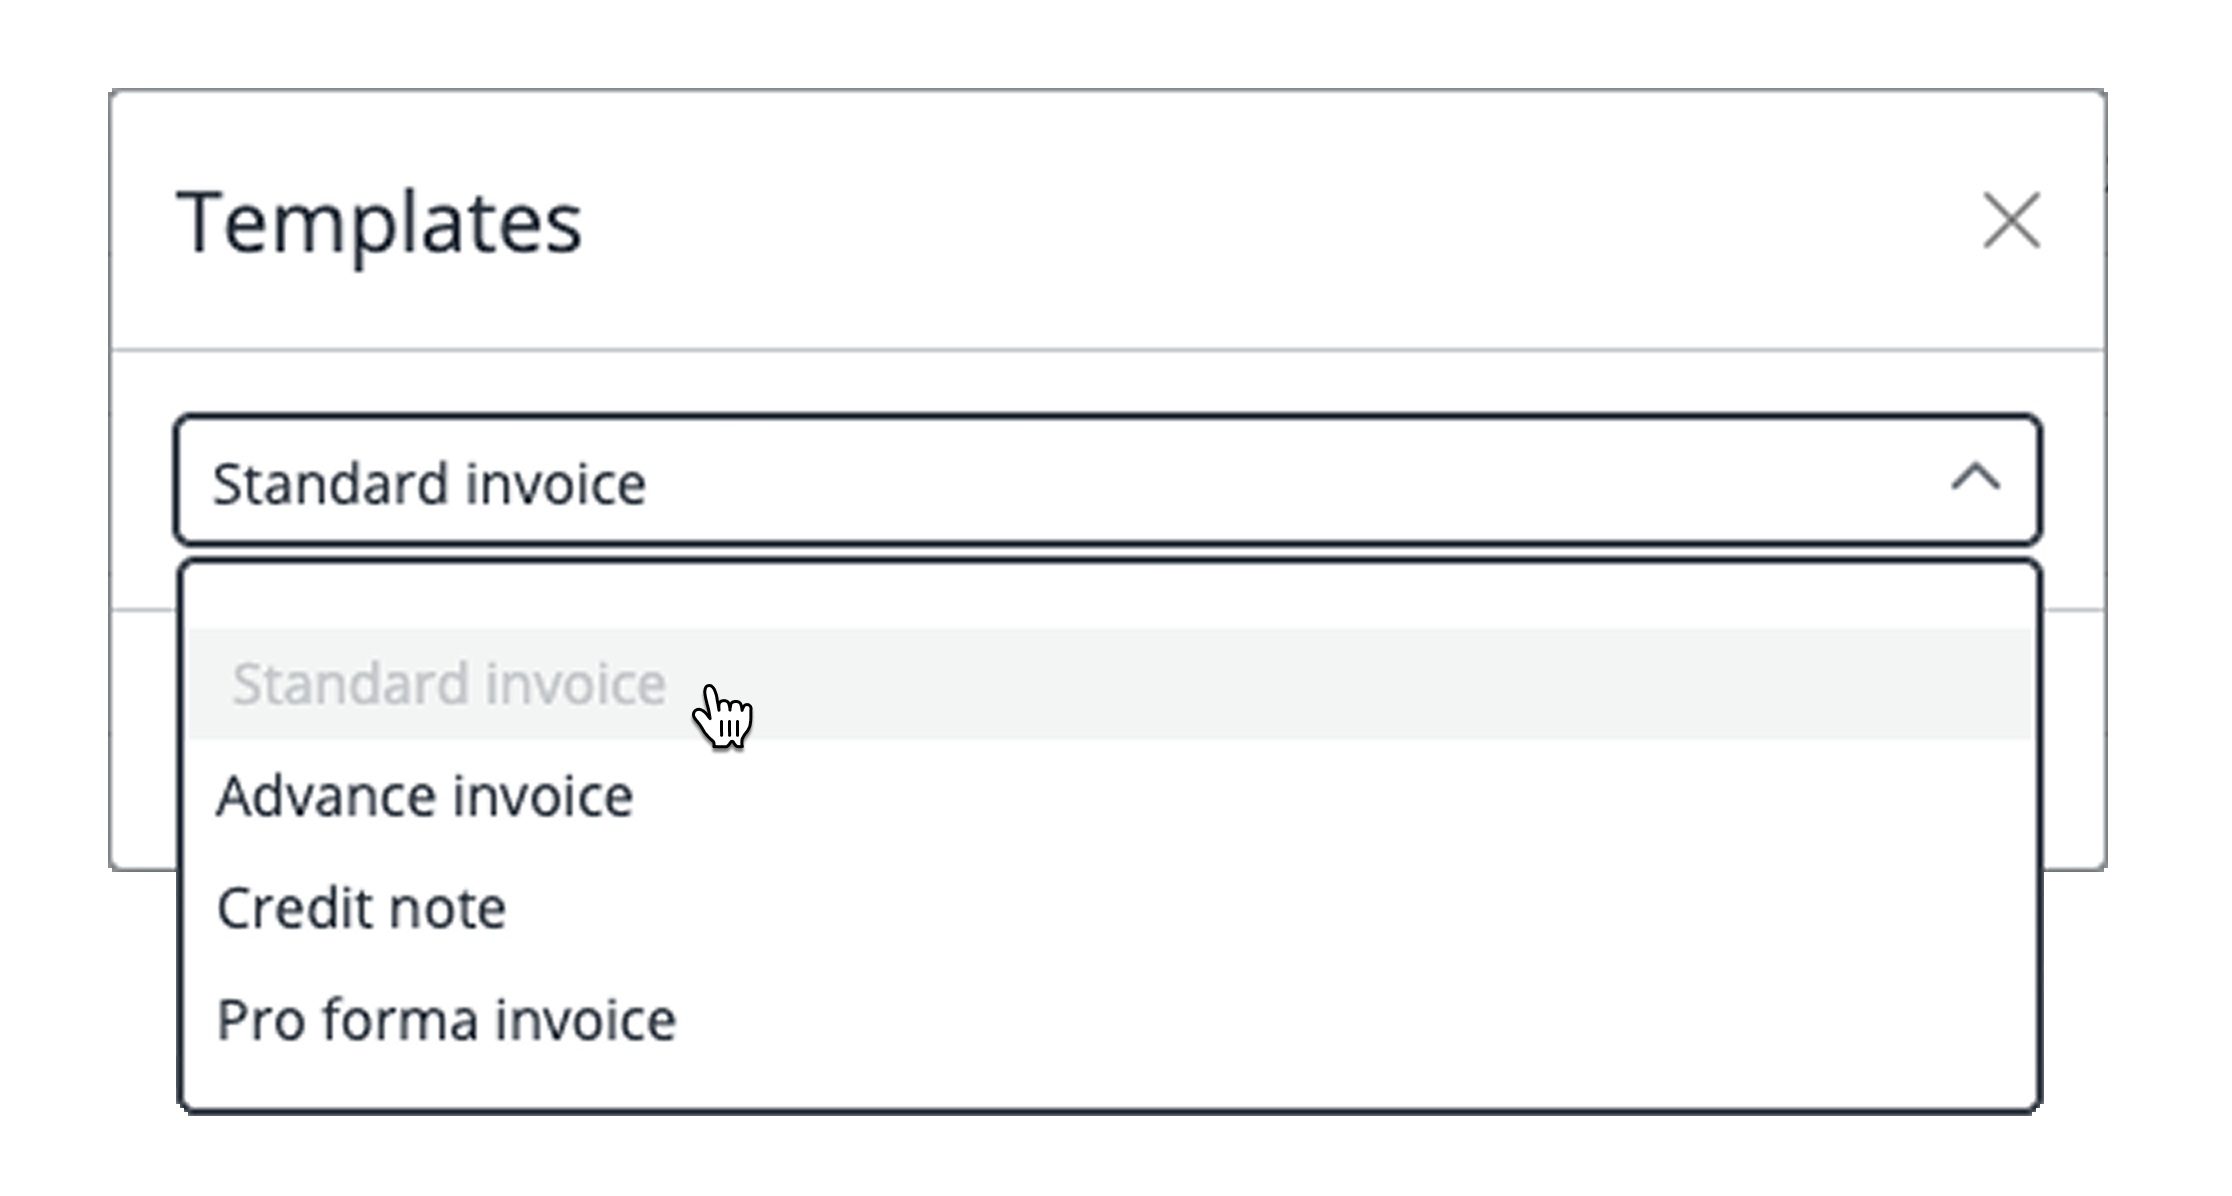
Some objects may offer multiple templates — predefined versions of the form tailored for different types of requests. If templates are available, clicking Create will display a list from which you can select the one that best suits your needs. This ensures that you open the correct form and only fill in the relevant fields.
Creating outside a specific object
If you’re not in an object view, clicking Create opens a list of all available requests across companies and types, based on your user rights. You can filter this list or search for a specific form. Frequently used templates can be marked as favorites for quicker access in the future.
Filter Panel
On the right side of the page, you’ll find the filter panel toggle. Clicking this button opens a panel with options to filter requests by various criteria. Clicking the button again will hide the panel.

You can filter by status, role, tags, or define custom filters using multiple conditions. In addition, the panel includes search and sort tools to help you quickly find or organize data.
If filters are active, a small badge will appear next to the button, indicating the number of filters currently applied.

In the top-right corner of the filter panel, you’ll find a gear icon. Click it to manage which filtering options are visible—such as Role, Status, Tags, or Custom Filters.

If you know that certain filter types are not relevant to your current view, feel free to hide them. This improves clarity and speeds up data loading—especially useful in more complex views.
For detailed instructions on how to use filters effectively, see this article.
Request List
Below the object header, you’ll see a table displaying all relevant requests. Each row represents one item you can view, monitor, or take action on.
The data shown is configured by your administrator and may vary depending on the object. Common fields include ID, Name, Created date, Amount, and other object-specific fields.
You can display the list in two different view modes: Grid view and Table view. To switch between them, use the icons located on the right side of the filter panel — the left icon represents Grid view, and the right one represents Table view. The currently active view is visually highlighted, so you always know which mode you’re using.

- Grid view – A compact layout showing key request information at a glance. Ideal for quick browsing and fast task handling.
- Table view – A spreadsheet-like layout similar to Excel. Offers greater flexibility, such as column resizing, pinning, inline filtering, and summary functions. Ideal for analysis or bulk review.
Request Actions
At the beginning of each row, you see a checkbox that lets you select one or more requests at once. When you select items, the toolbar appears automatically and offers bulk actions for the chosen requests. For a detailed description, see the chapter Toolbar.

At the end of each row, you’ll find a three-dot menu that provides actions related only to that specific, checked request. The available options vary depending on the view (Inbox, Active, All, Following) you are in, as well as the system configuration. For more details, see the chapter Row actions.

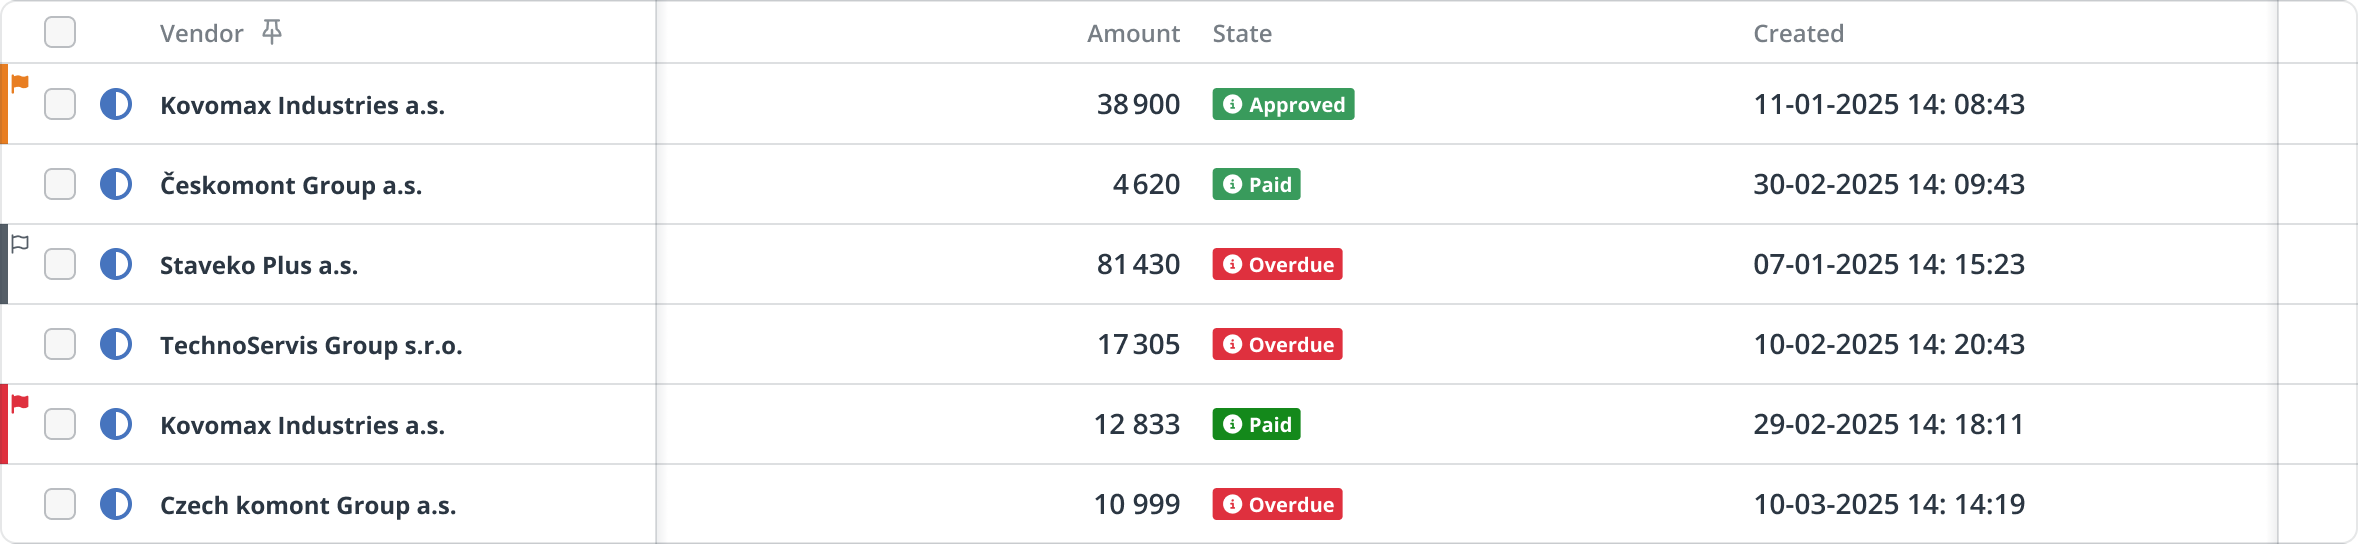
Visual Indicators
Each request may include visual icons indicating its status:
- Green check mark: the request is completed.

- Blue semi-circle: the request is in progress.

Some requests may be marked with a small colored flag at the beginning of the row. This visual indicator helps you quickly identify the importance of each request:
- Red – high priority – tasks that should be addressed first.
- Orange – medium priority – tasks that should be resolved soon.
- Gray – low priority – tasks that don’t require immediate attention.
If no flag is shown, the request doesn’t have a priority explicitly set.
Another visual indicator is the lock icon, which means someone else is currently working on the request. This usually happens during a workflow transition or while a user is editing the request. To avoid conflicting changes, the system blocks access for others. Once the original user finishes and releases the request, it becomes available again.

These indicators help you quickly understand which items are pending, complete, or temporarily unavailable—without needing to open each one.
Pagination
By default, the list displays 15 items per page. If the total exceeds this limit, pagination is automatically enabled. You can navigate between pages using the arrows at the bottom and adjust the page size to show 15, 30, 50, or 100 rows per page.

Regardless of your selected page size, the system limits the total number of records displayed in a single view to 1000. This setting can be adjusted by your administrator if needed.
Speed up loading by filtering the data
For optimal performance, we recommend filtering the request list as much as possible. This helps the system load only the relevant data, improving speed, especially useful in large or complex views. Learn more about filtering here.