Application Header
Application header is always available on every page of the application and contains key controls. It includes a button to return to the home page, the notification center, the user menu, and in some cases it displays information about the current environment.

Home button
In the top left corner, you can find the Home button. It is displayed as the Xeelo logo or your organization’s logo. Click it at any time to return to your selected home page. You can change it in the My Profile section.
You can set Dashboard or one of the views as the default page: Active, Inbox, All, or Following.

Environment label
A label may be displayed in the top bar to indicate the environment you are currently working in. This helps you easily identify whether you are in a production, test (UAT), or development environment.

The label is displayed only in non production environments. However, if your organization uses, for example, a test environment for UAT or separate development instances, a clear Test or Development label is displayed. This label helps prevent mistakes and gives you confidence that you are working in the correct environment.
Notification center
On the right side of the top bar, you can find the bell icon, which serves as the notification center. If you have new or unread notifications, a numeric badge is displayed next to the icon to indicate the number of notifications.

Notifications include not only the message itself, but also a button that takes you directly to the related request. Depending on administrator settings, selected workflow actions can also be displayed in the notification. In some cases, you can process the request directly from the notification without opening it first.
User menu
Next to the notification center, the name of the currently signed in user is displayed. Click the arrow to open the user menu, where you can go to My Profile or Log out of the application.

My Profile
The My Profile section is used to configure your personal account in the Xeelo system. It allows you to edit basic information, customize the environment to your preferences, set up delegations when you are away, manage notifications, and manage connections to mobile devices. With these options, you can set up Xeelo so it best matches your needs and your way of working.
The section is divided into four tabs:
Account settings
This section is used to manage basic user details and customize the Xeelo environment to your preferences.
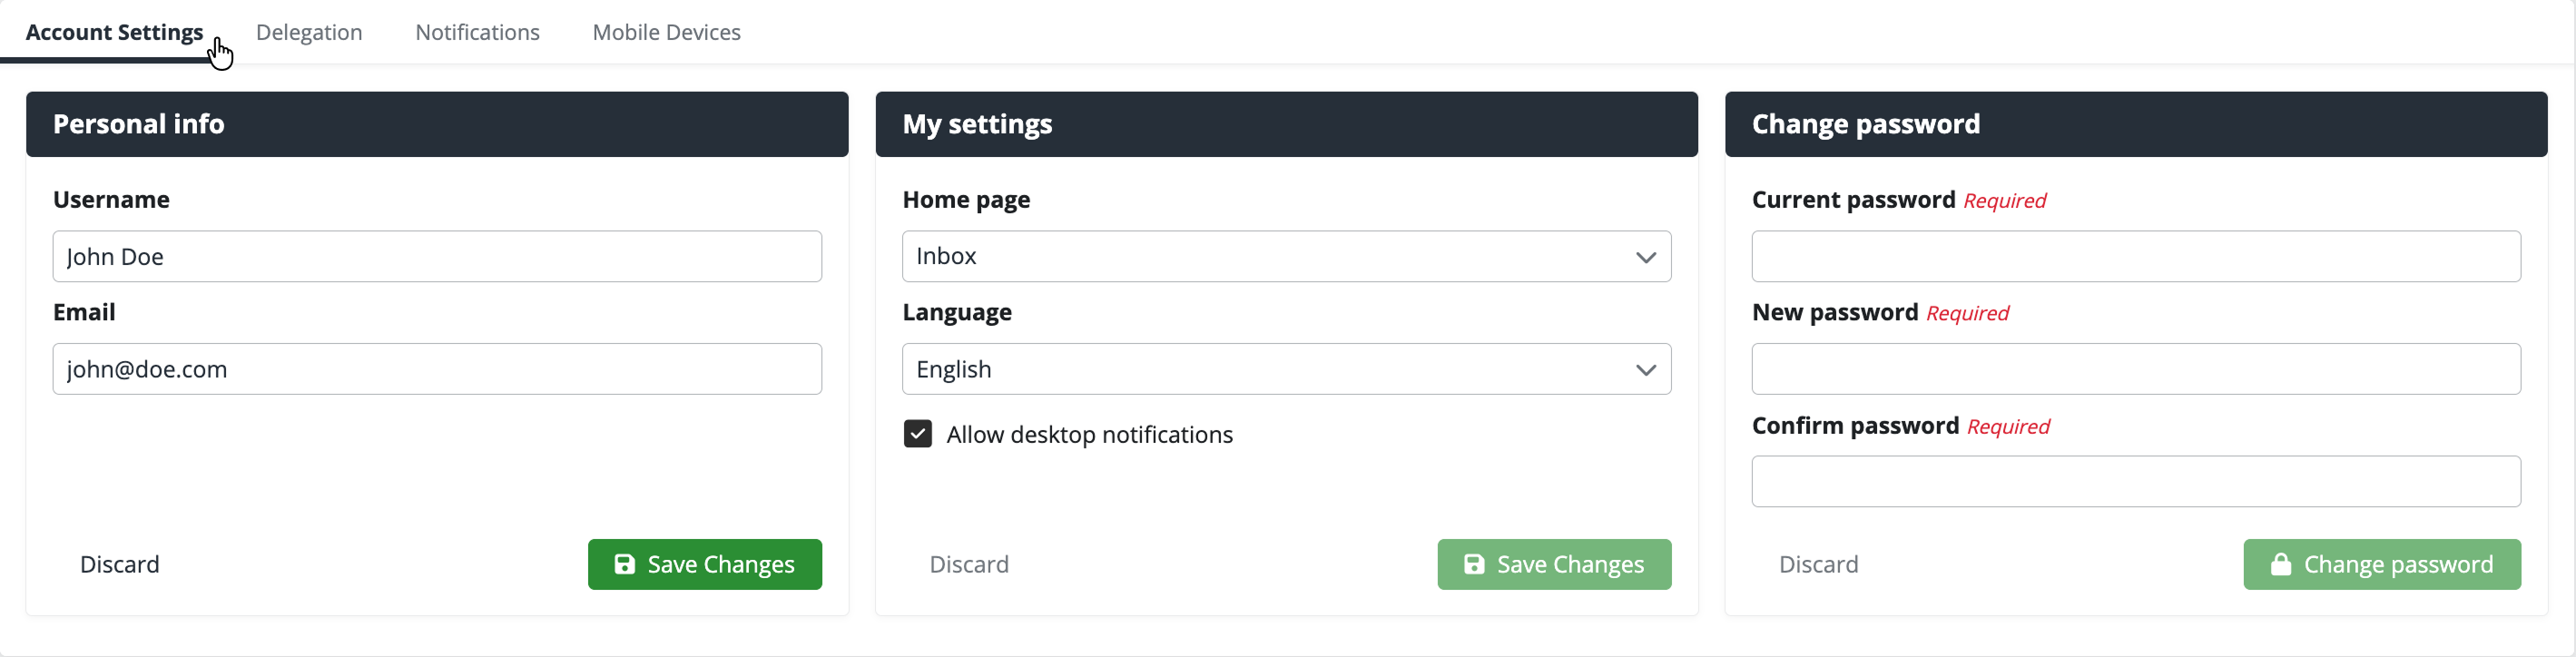
Edit your user name, email address, or select a default home page—the view that loads automatically after you sign in. Available options are Dashboard, Active, Inbox, All and Following
You can also switch the interface language and enable desktop notifications, which alert you to important events even when you do not currently have Xeelo open.
In the same section, you can change your password. Enter your current password, enter the new one, and confirm it. After you save, the change takes effect immediately.
Delegation
Delegation allows you to temporarily transfer your permissions to another user—for example, during vacation, sick leave, or another planned absence. The delegate can then act on your behalf, receive tasks, and work with requests in the same way as you.
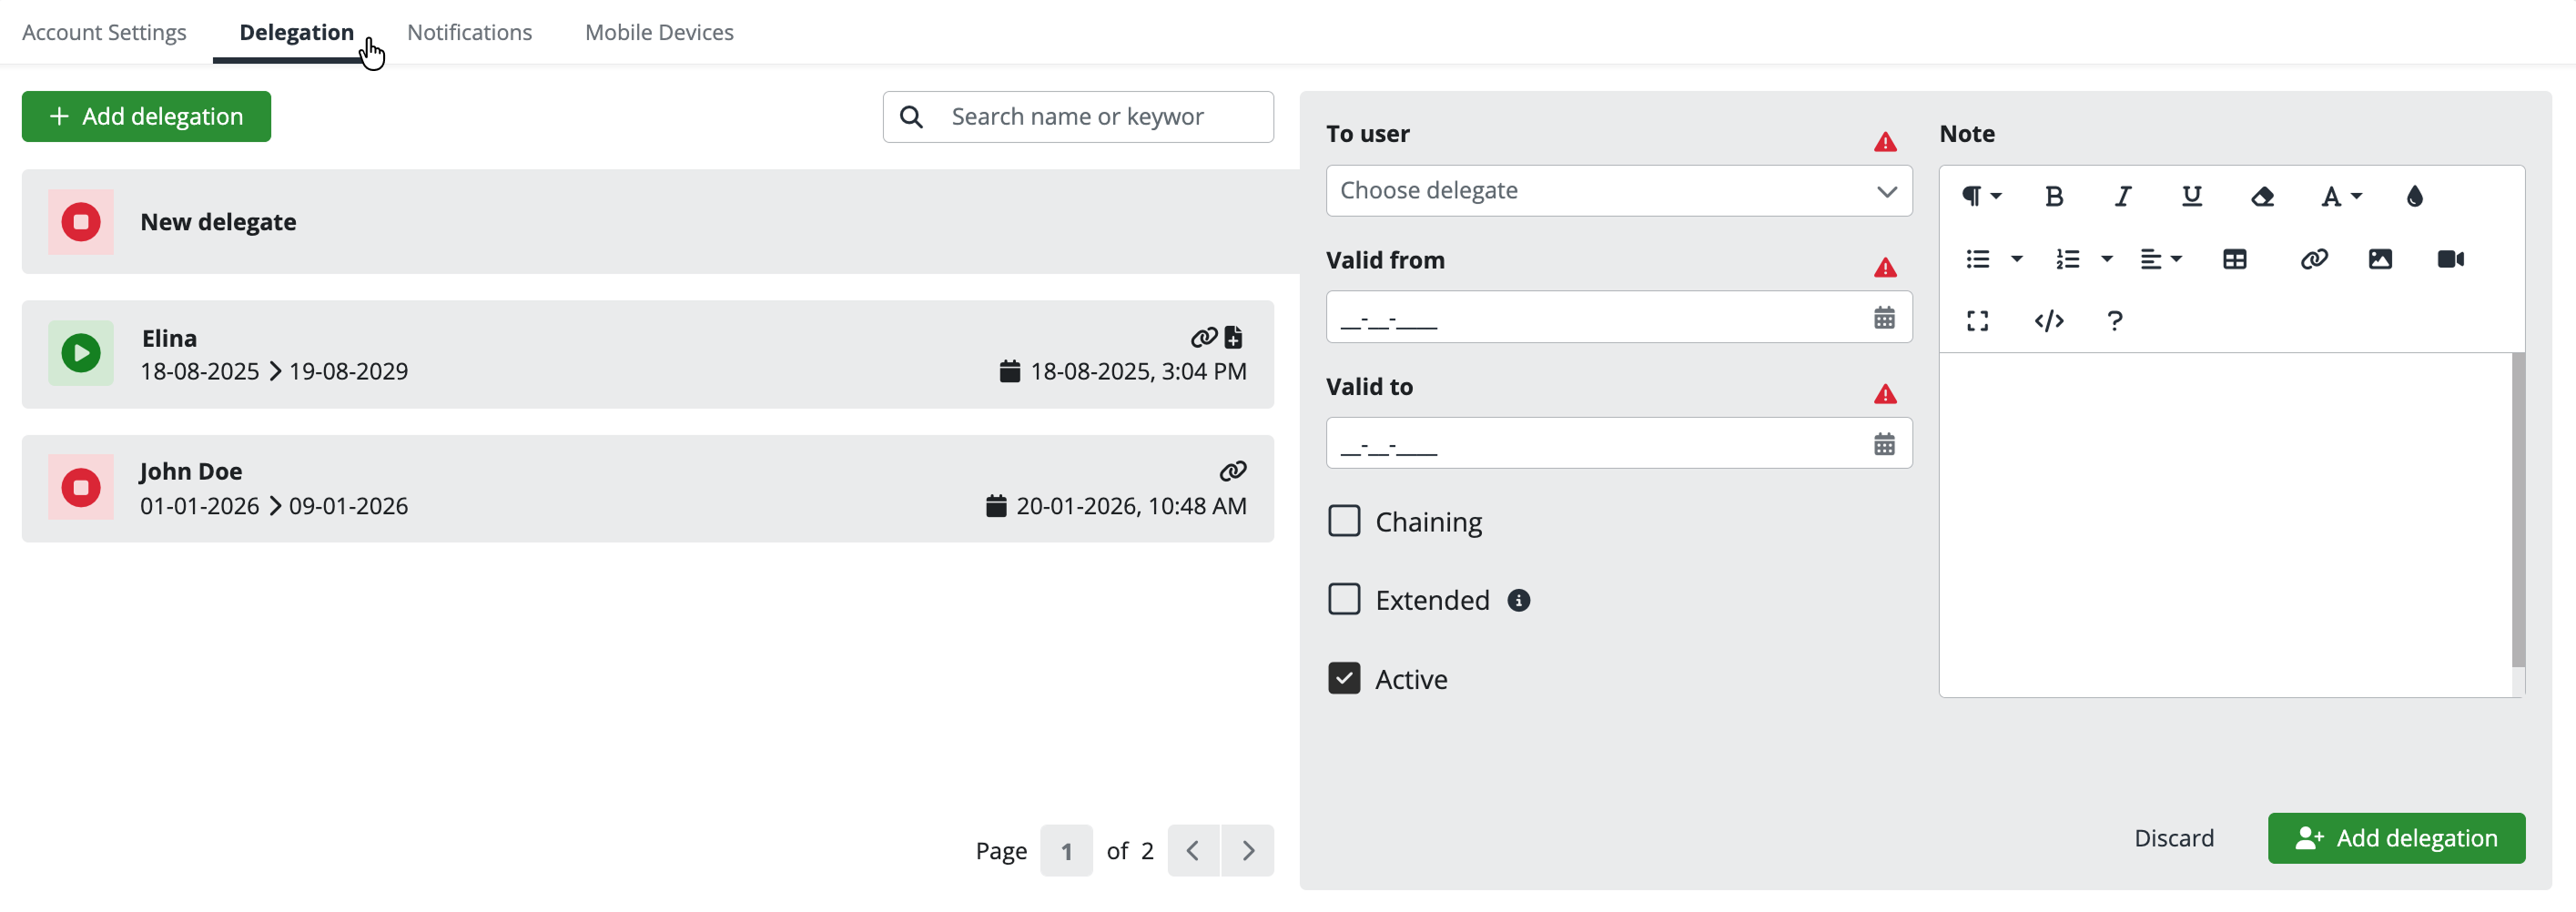
To create a new delegation, click Add delegation. On the right, select the user you want to grant access to and set the validity period.
Delegation options
When you create a delegation, you can use several additional options that define how access works:
-
Chaining - Allows access to be passed on. If you delegate permissions to a colleague and they then create their own delegation, a third person can get access not only to their requests, but also to yours. This option is especially useful in teams where you need to ensure continuous operation regardless of who is currently available.
-
Extended - A standard delegation allows working only with requests that already exist. If you select Extended, the delegate can create new requests and work with other parts of the system as well.
On the left side of the screen, you can see a list of all created delegations—active and ended. For each delegation, you can see who it was granted to, the period when it is valid, and you can easily identify whether Chaining or Extended permission is enabled by using the icons.
You can end an active delegation at any time. Clear the Active checkbox and save the change—the delegation is immediately deactivated and the granted access no longer applies.
Notifications
In this section, you configure when and which notifications the Xeelo system should send to you. You get an overview of important events that affect you without unnecessary noise.
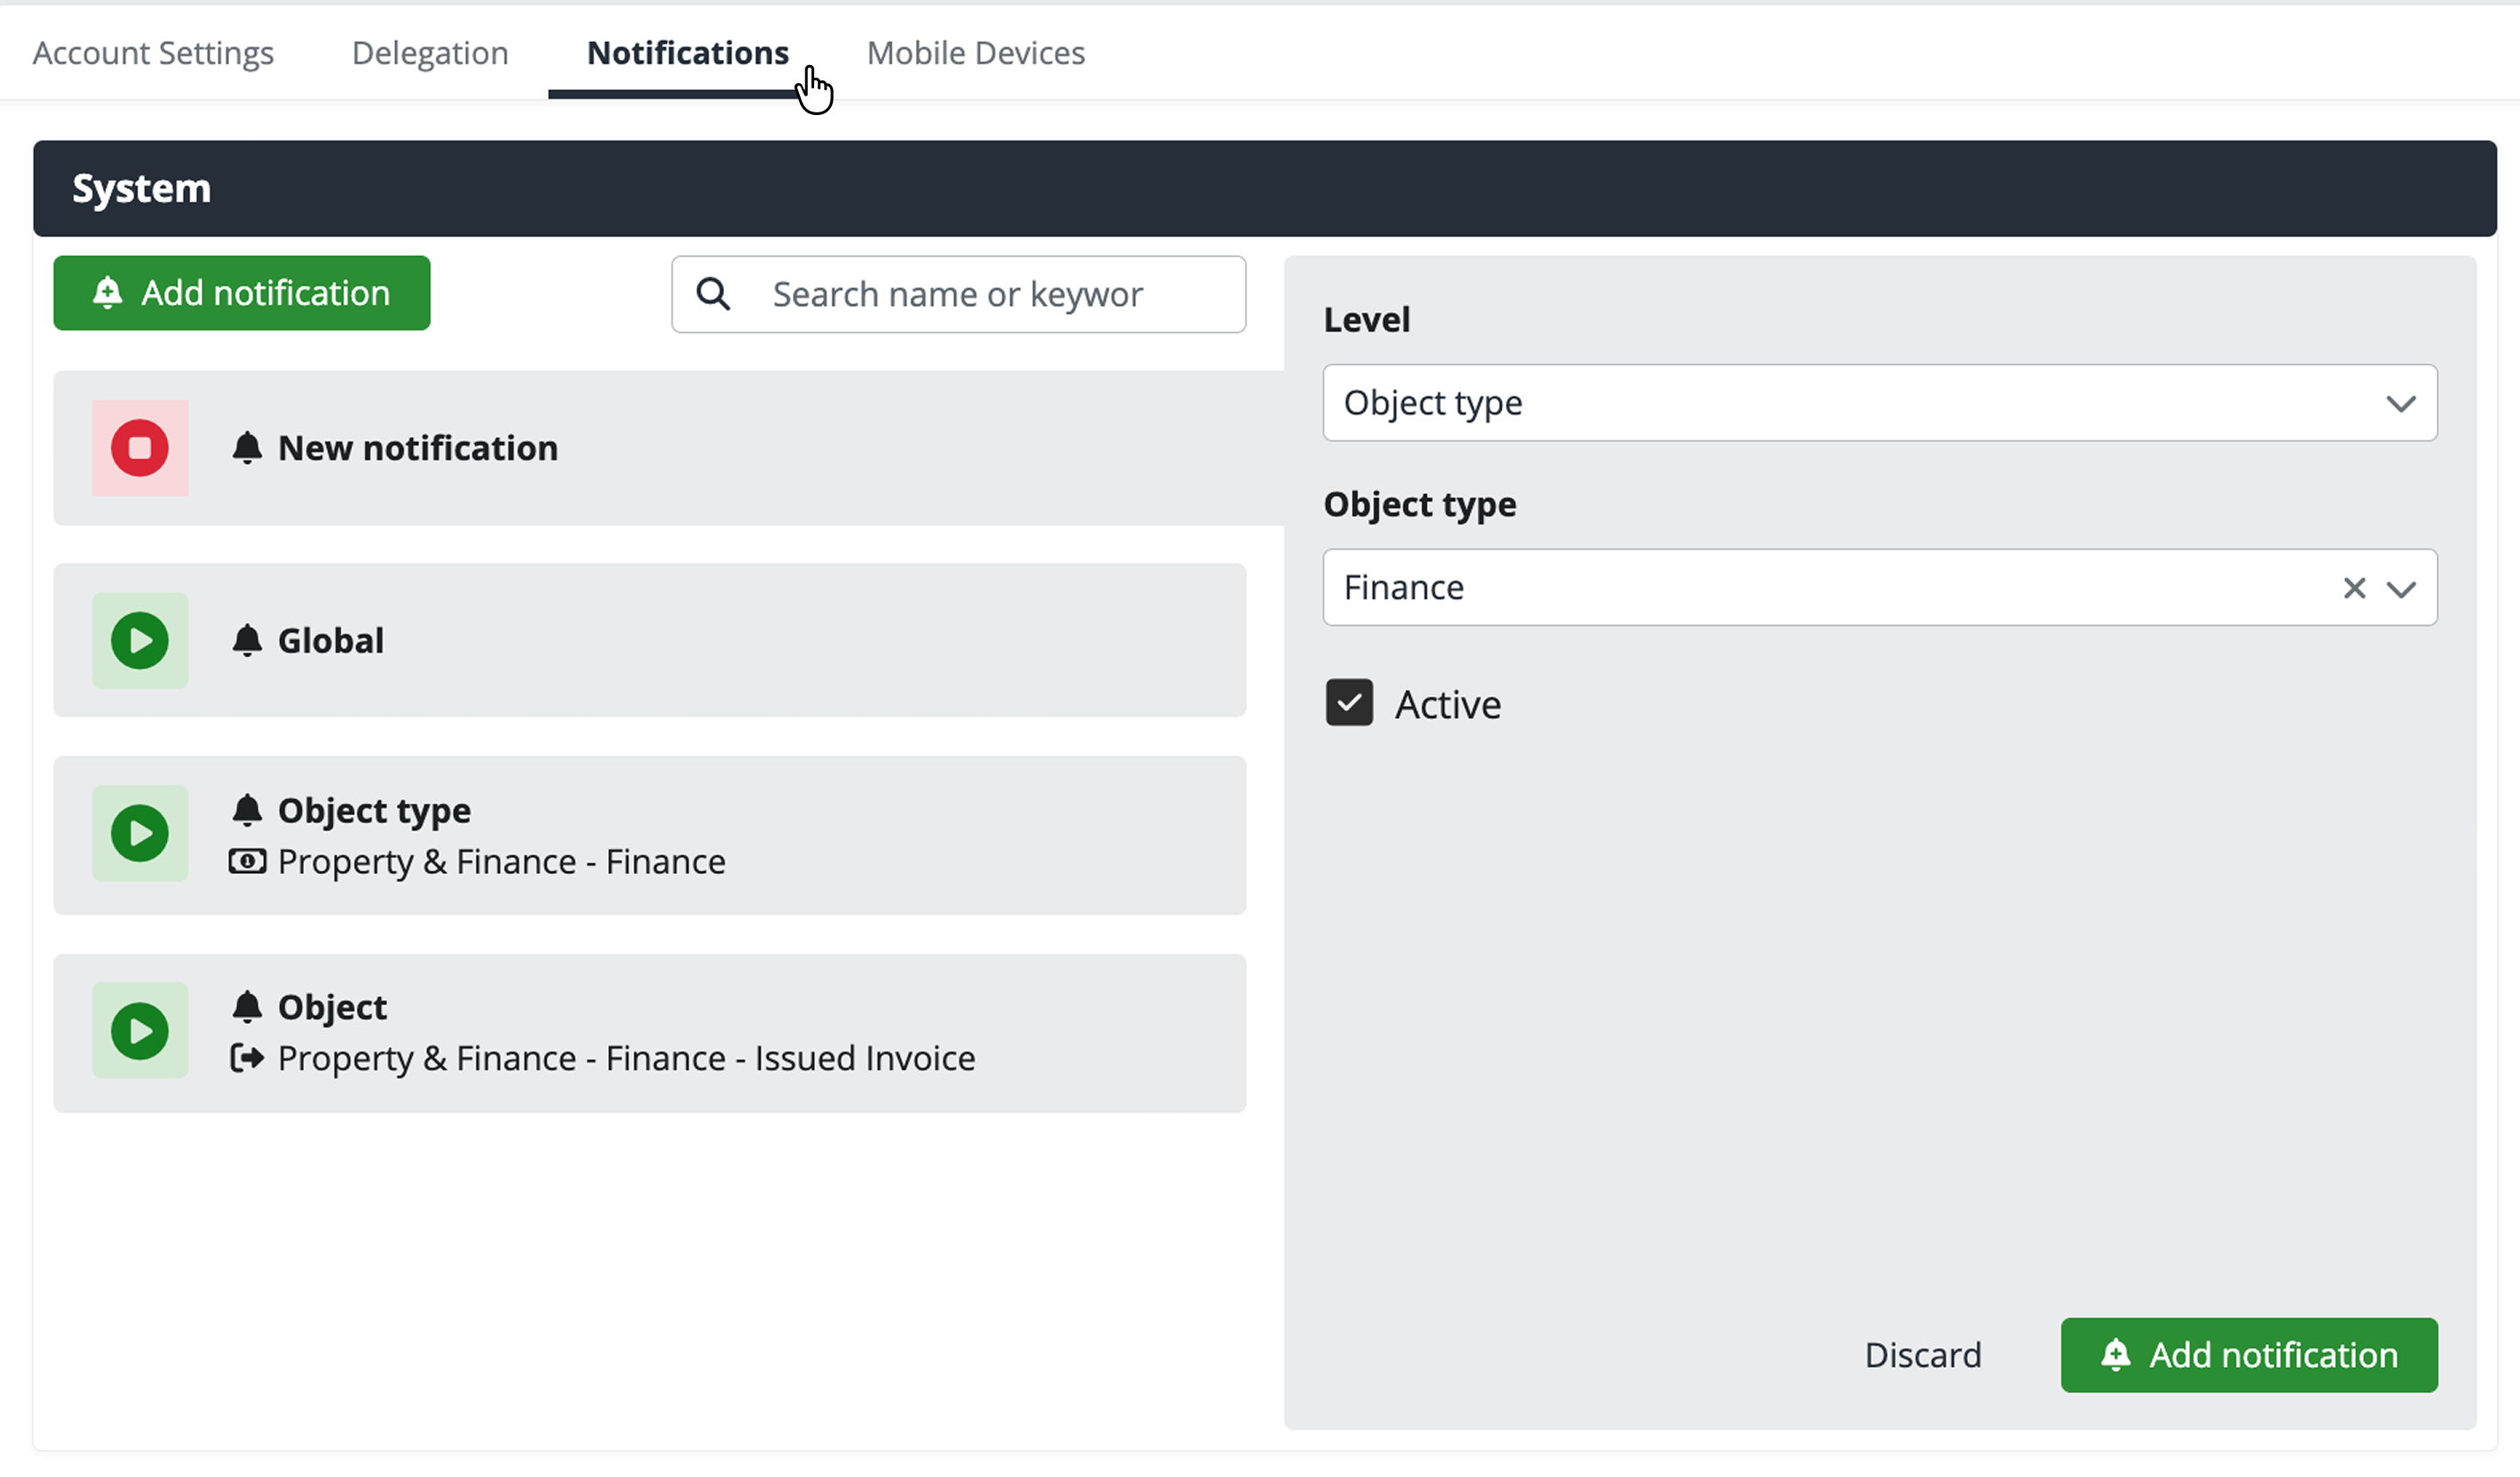
By default, most users have the Global level enabled. This means you receive all notifications you are entitled to based on system settings, your permissions, and the processes in progress. For example, when you have a task assigned on a specific object, when your action is required, or when a workflow step involves you.
If you want to tailor notifications more to your needs, disable the global level and select a different one. You can set notifications to be delivered only for specific companies, specific object types, or selected objects. This helps you focus only on what is truly important to you.
Note
- Company is the highest level in Xeelo—it typically corresponds to a specific department, project, or area.
- Object type groups similar agendas—for example, Invoices, Contracts, or Approval forms.
- Object is a specific agenda where your work takes place—it contains individual requests, documents, or processes.
With notification settings, you gain control over what is sent to your email, and you stay informed without distracting or irrelevant messages.
Mobile devices
The Xeelo system is also available through the mobile application—Xeelo Mobile. It gives you access to your tasks and requests from anywhere, even if you do not have a computer available.
The mobile application is ideal for field work or travel. It supports offline mode, so you can work even without an internet connection—for example, prepare a request, fill in a form, or add a note. When you reconnect to the network, all changes are synchronized automatically.
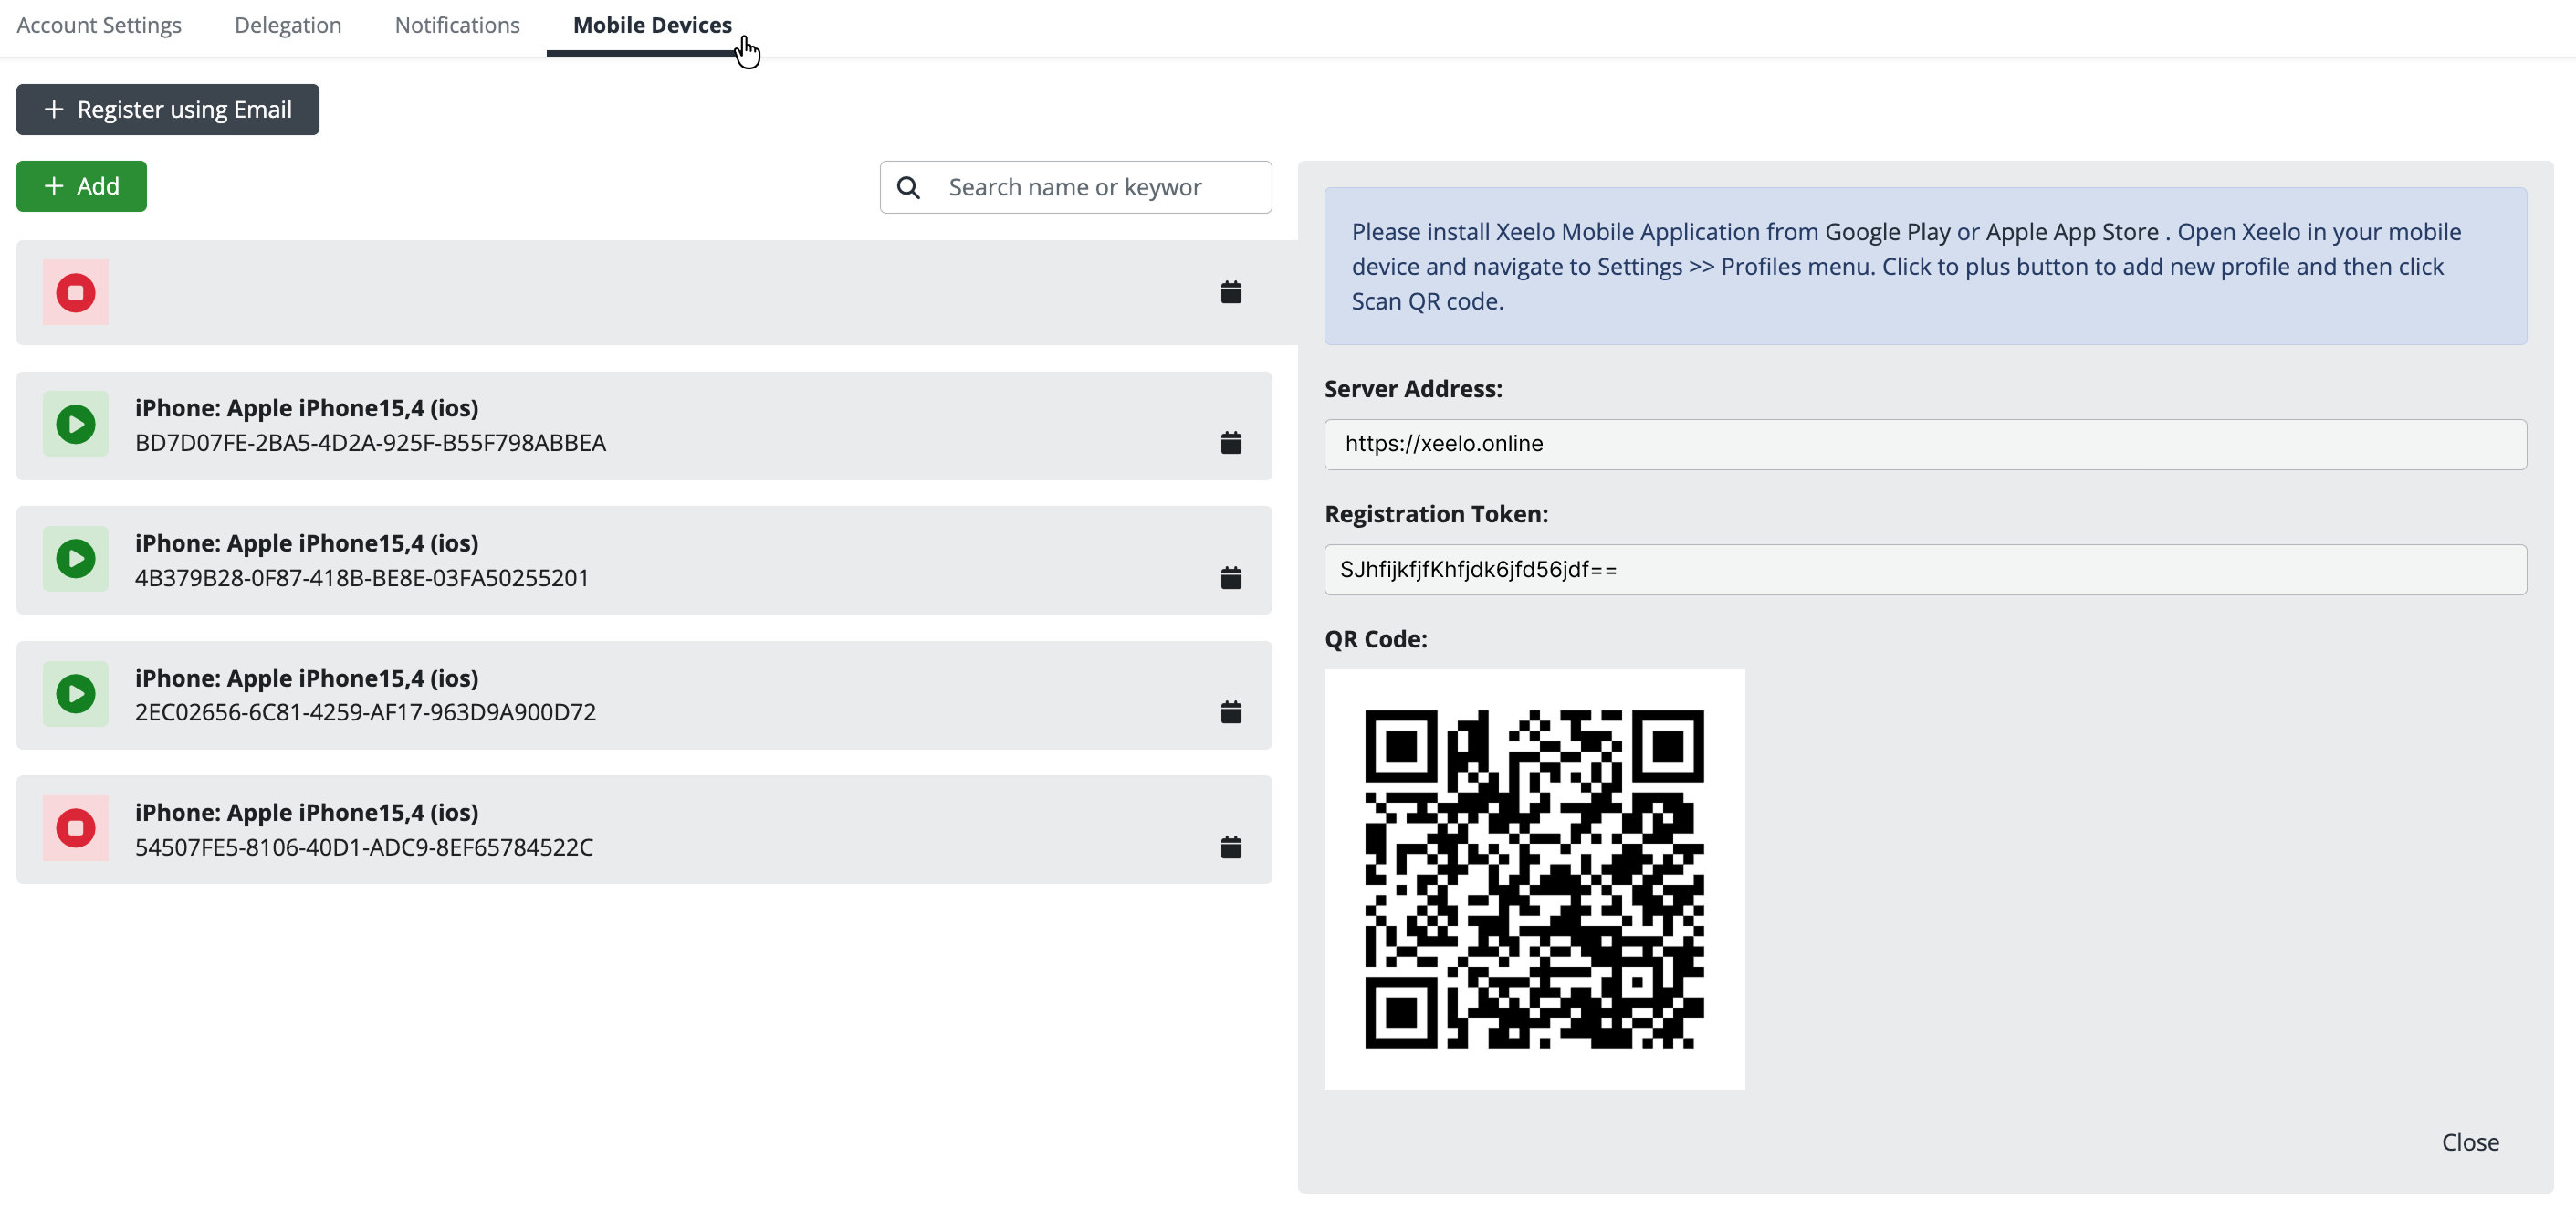
In this section, you can see an overview of all devices linked to your account. For each device, the list shows its name, technical identifier (UUID), and the account connection status. Green indicates that the device is currently still linked, red indicates that the connection has been ended.
Click a device to view its details—name, technical identifier, and connection status. For active devices, you can manually end the connection by clearing the Active checkbox. Confirm the change by clicking Save changes.
Adding a new device
To connect a new device, use the Add button. A QR code, server address, and registration token are displayed on the right.
- Install the Xeelo mobile application from Google Play or Apple App Store.
- Open the application on your device.
- After launch, you will be prompted to connect to your account—you have two options:
- Scan the QR code displayed on your computer screen.
- Enter details manually: the server address and the registration token.
- After a successful scan or manual entry, the device is automatically linked to your account and starts receiving notifications.
Alternative registration method – via email
If scanning the QR code is not convenient, you can use + Register using Email button. An email message is sent to your email address with a link that is valid for 7 days. Open the email directly on your mobile device and click the link to complete the connection.