Inbox Grid
Inbox is your personal to-do list in the Xeelo platform. Here you’ll find all tasks and requests assigned to you and waiting for your action. This way, you always know what needs to be done and never miss anything important.
It serves as a clear workspace for managing your activities. Instead of navigating through multiple steps, you can access your tasks directly—organized, accessible, and ready for quick action. The goal is to keep all important information in one place and reduce unnecessary clicks in your daily work.
Navigation
At the top of the screen, you’ll find tabs that let you switch between different companies. In Xeelo, a company represents the highest level of organizational structure. Each company works as a separate framework for a specific area of work.

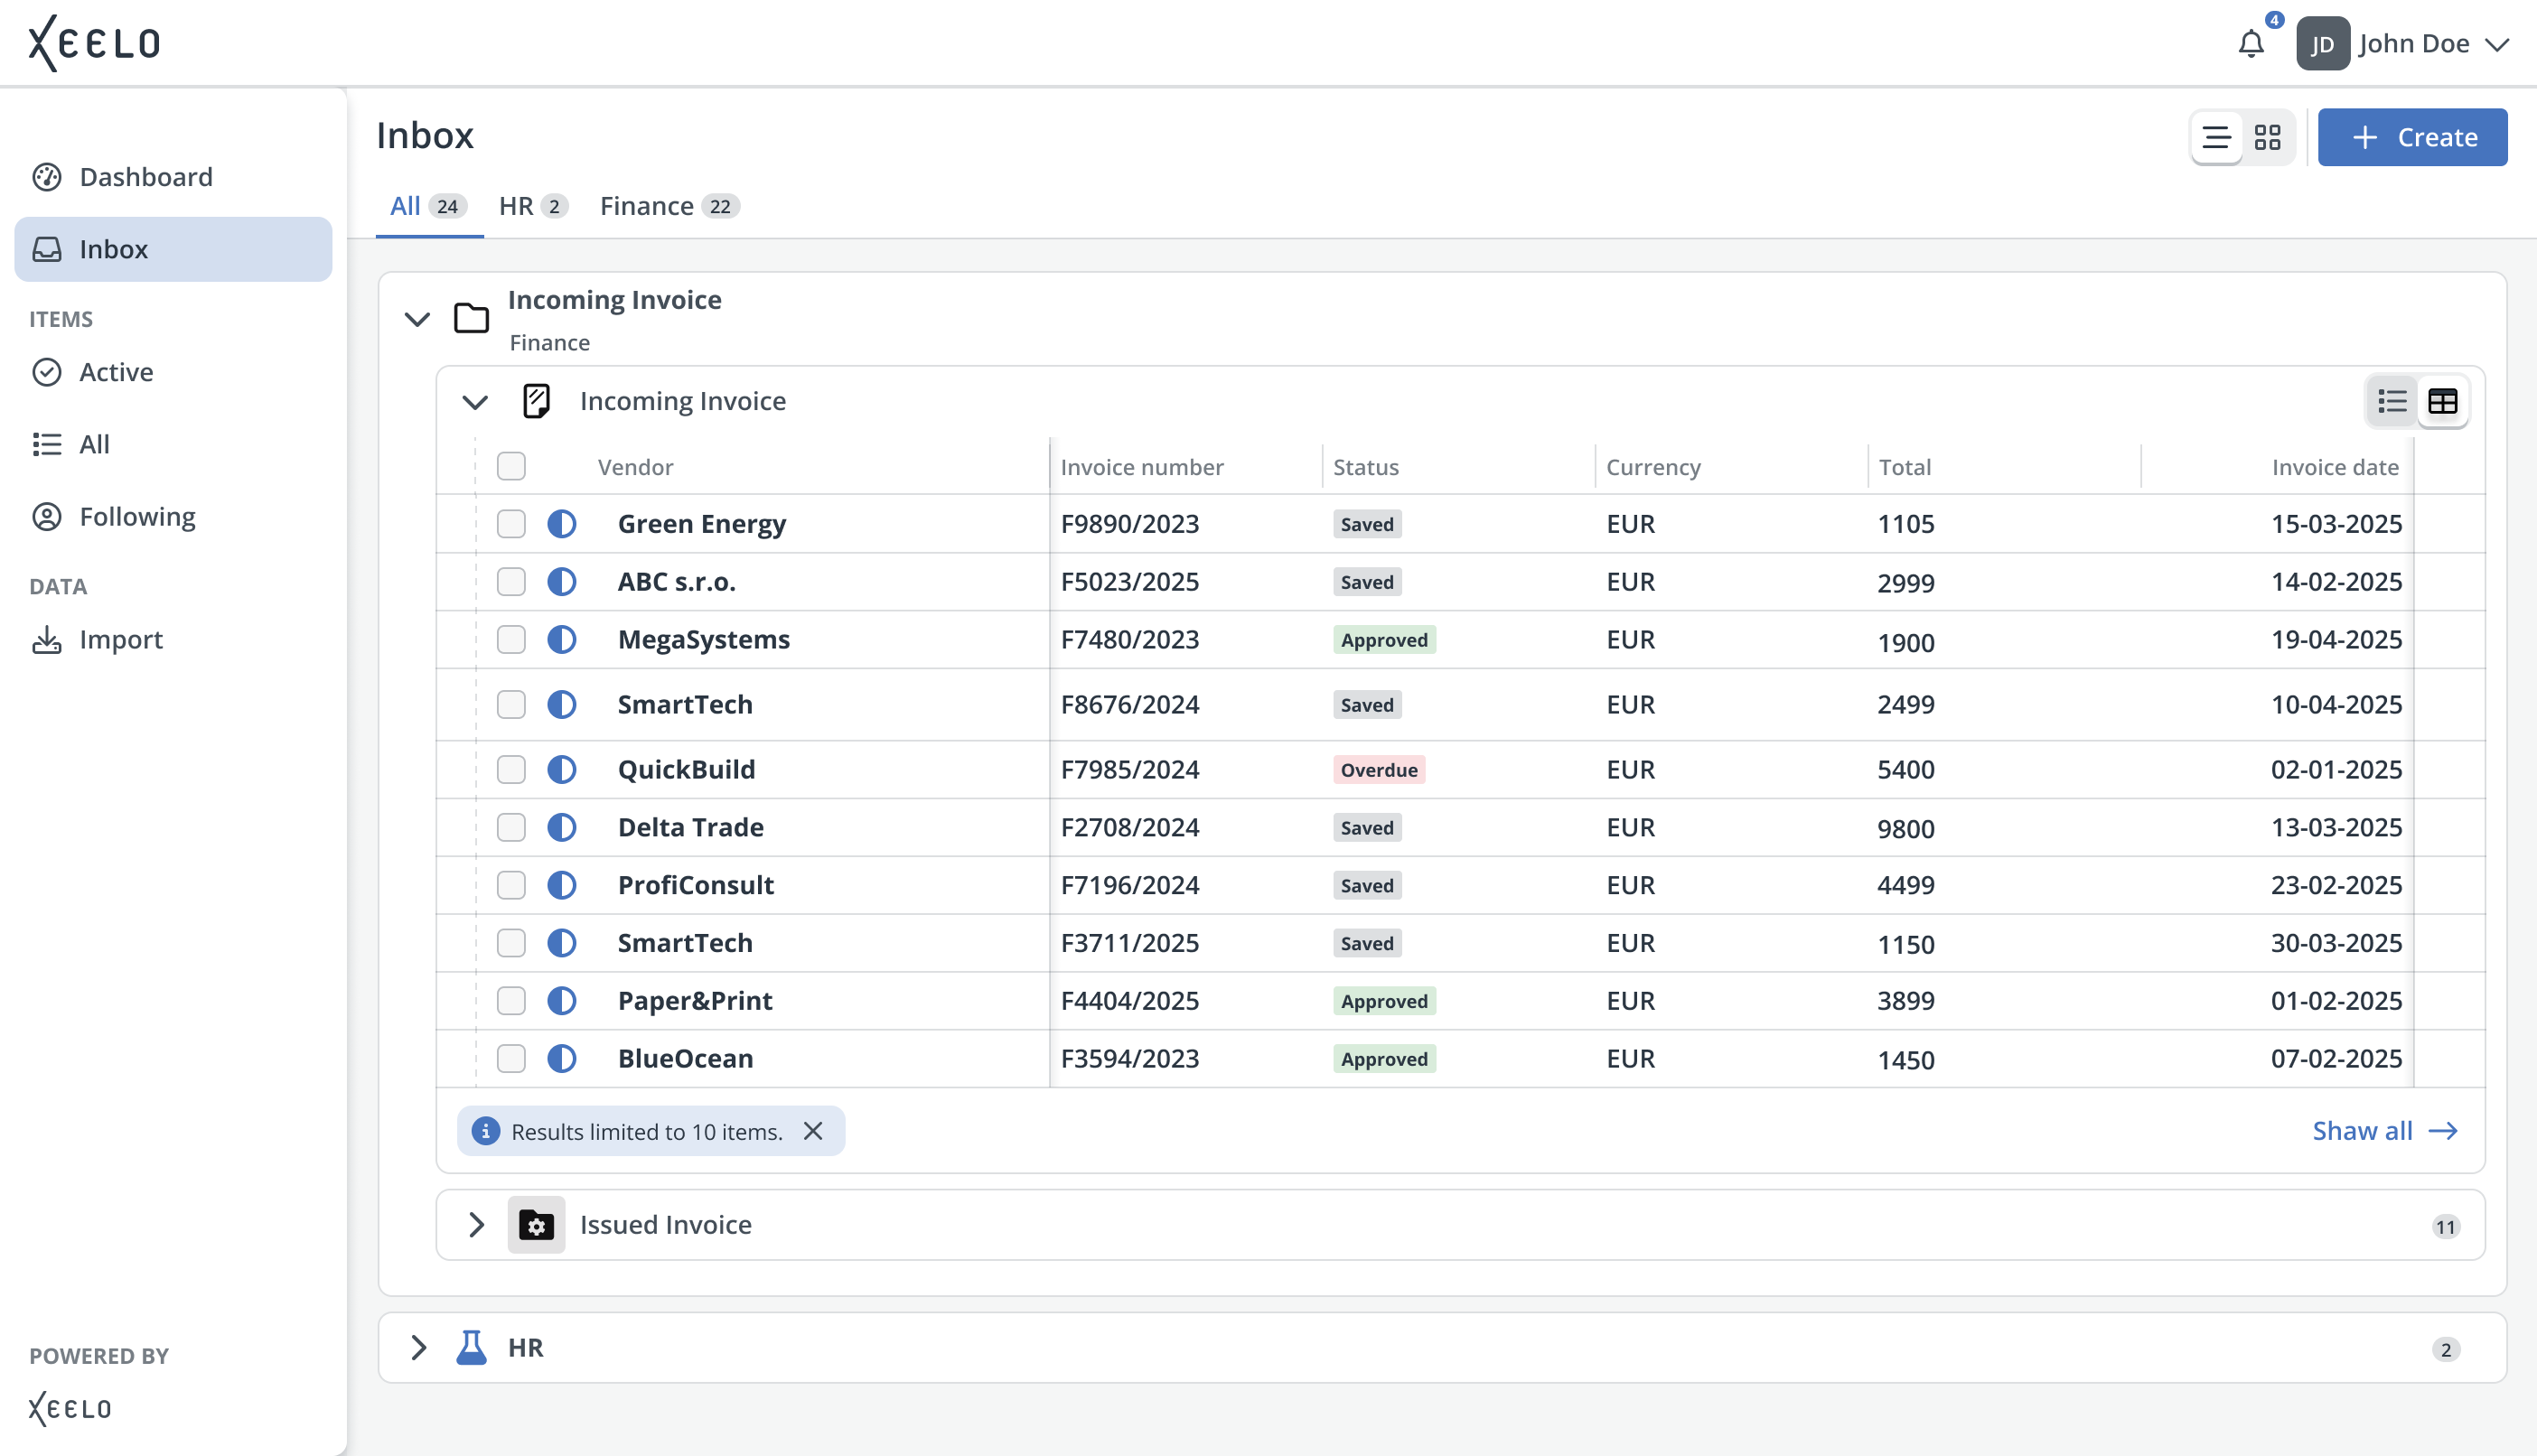
By default, the All tab opens first, showing the complete list of all requests currently assigned to you across the platform. If you want to focus on a single company, just click its tab. Each tab also shows a number indicating how many active requests you currently have in that company.
Below the tabs, you’ll see a list of object types — another level of structure. These work like categories that group related objects, such as invoices, contracts, employee records, etc.
Each object type contains one or more objects. Objects are specific workspaces where you’ll find the requests related to that area.
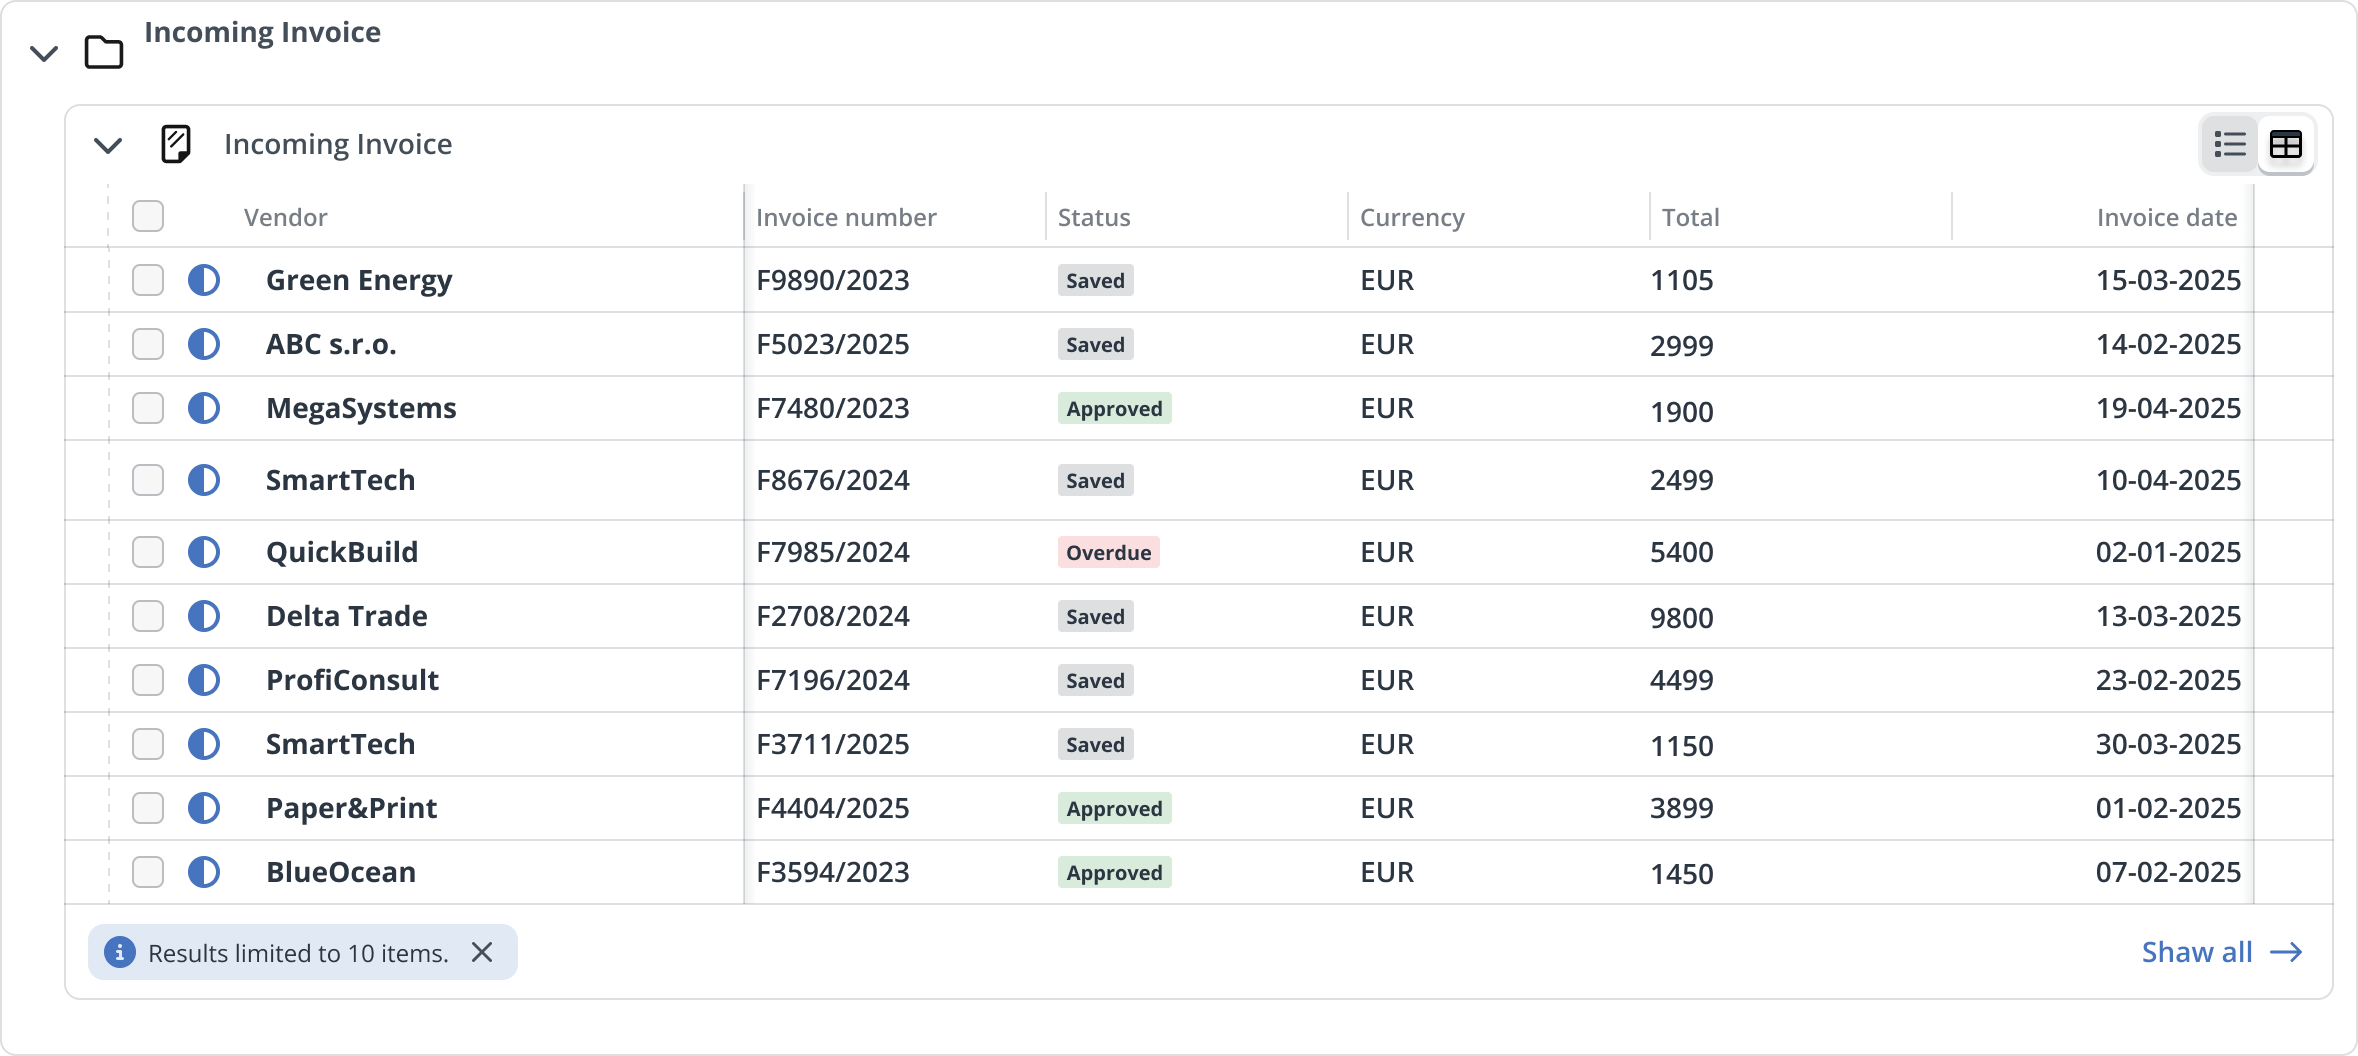
Each object displays up to 10 most recent requests. If there are more, the system shows the message Results limited to 10 items. Clicking Show all opens the full list of requests for that object. You can find more details about working with this list here.
By default, object types and their objects are expanded, so you immediately see the requests waiting for you. If you prefer a cleaner view, you can collapse them at any time. Even in collapsed state, the number of active requests stays visible, so you always know where work is pending.
Card view
Besides the default list view, you can also switch to a card view. This mode displays the structure of companies, object types, and objects, along with the number of assigned requests, but it doesn’t show the requests directly. Clicking a selected object opens its full list of requests.
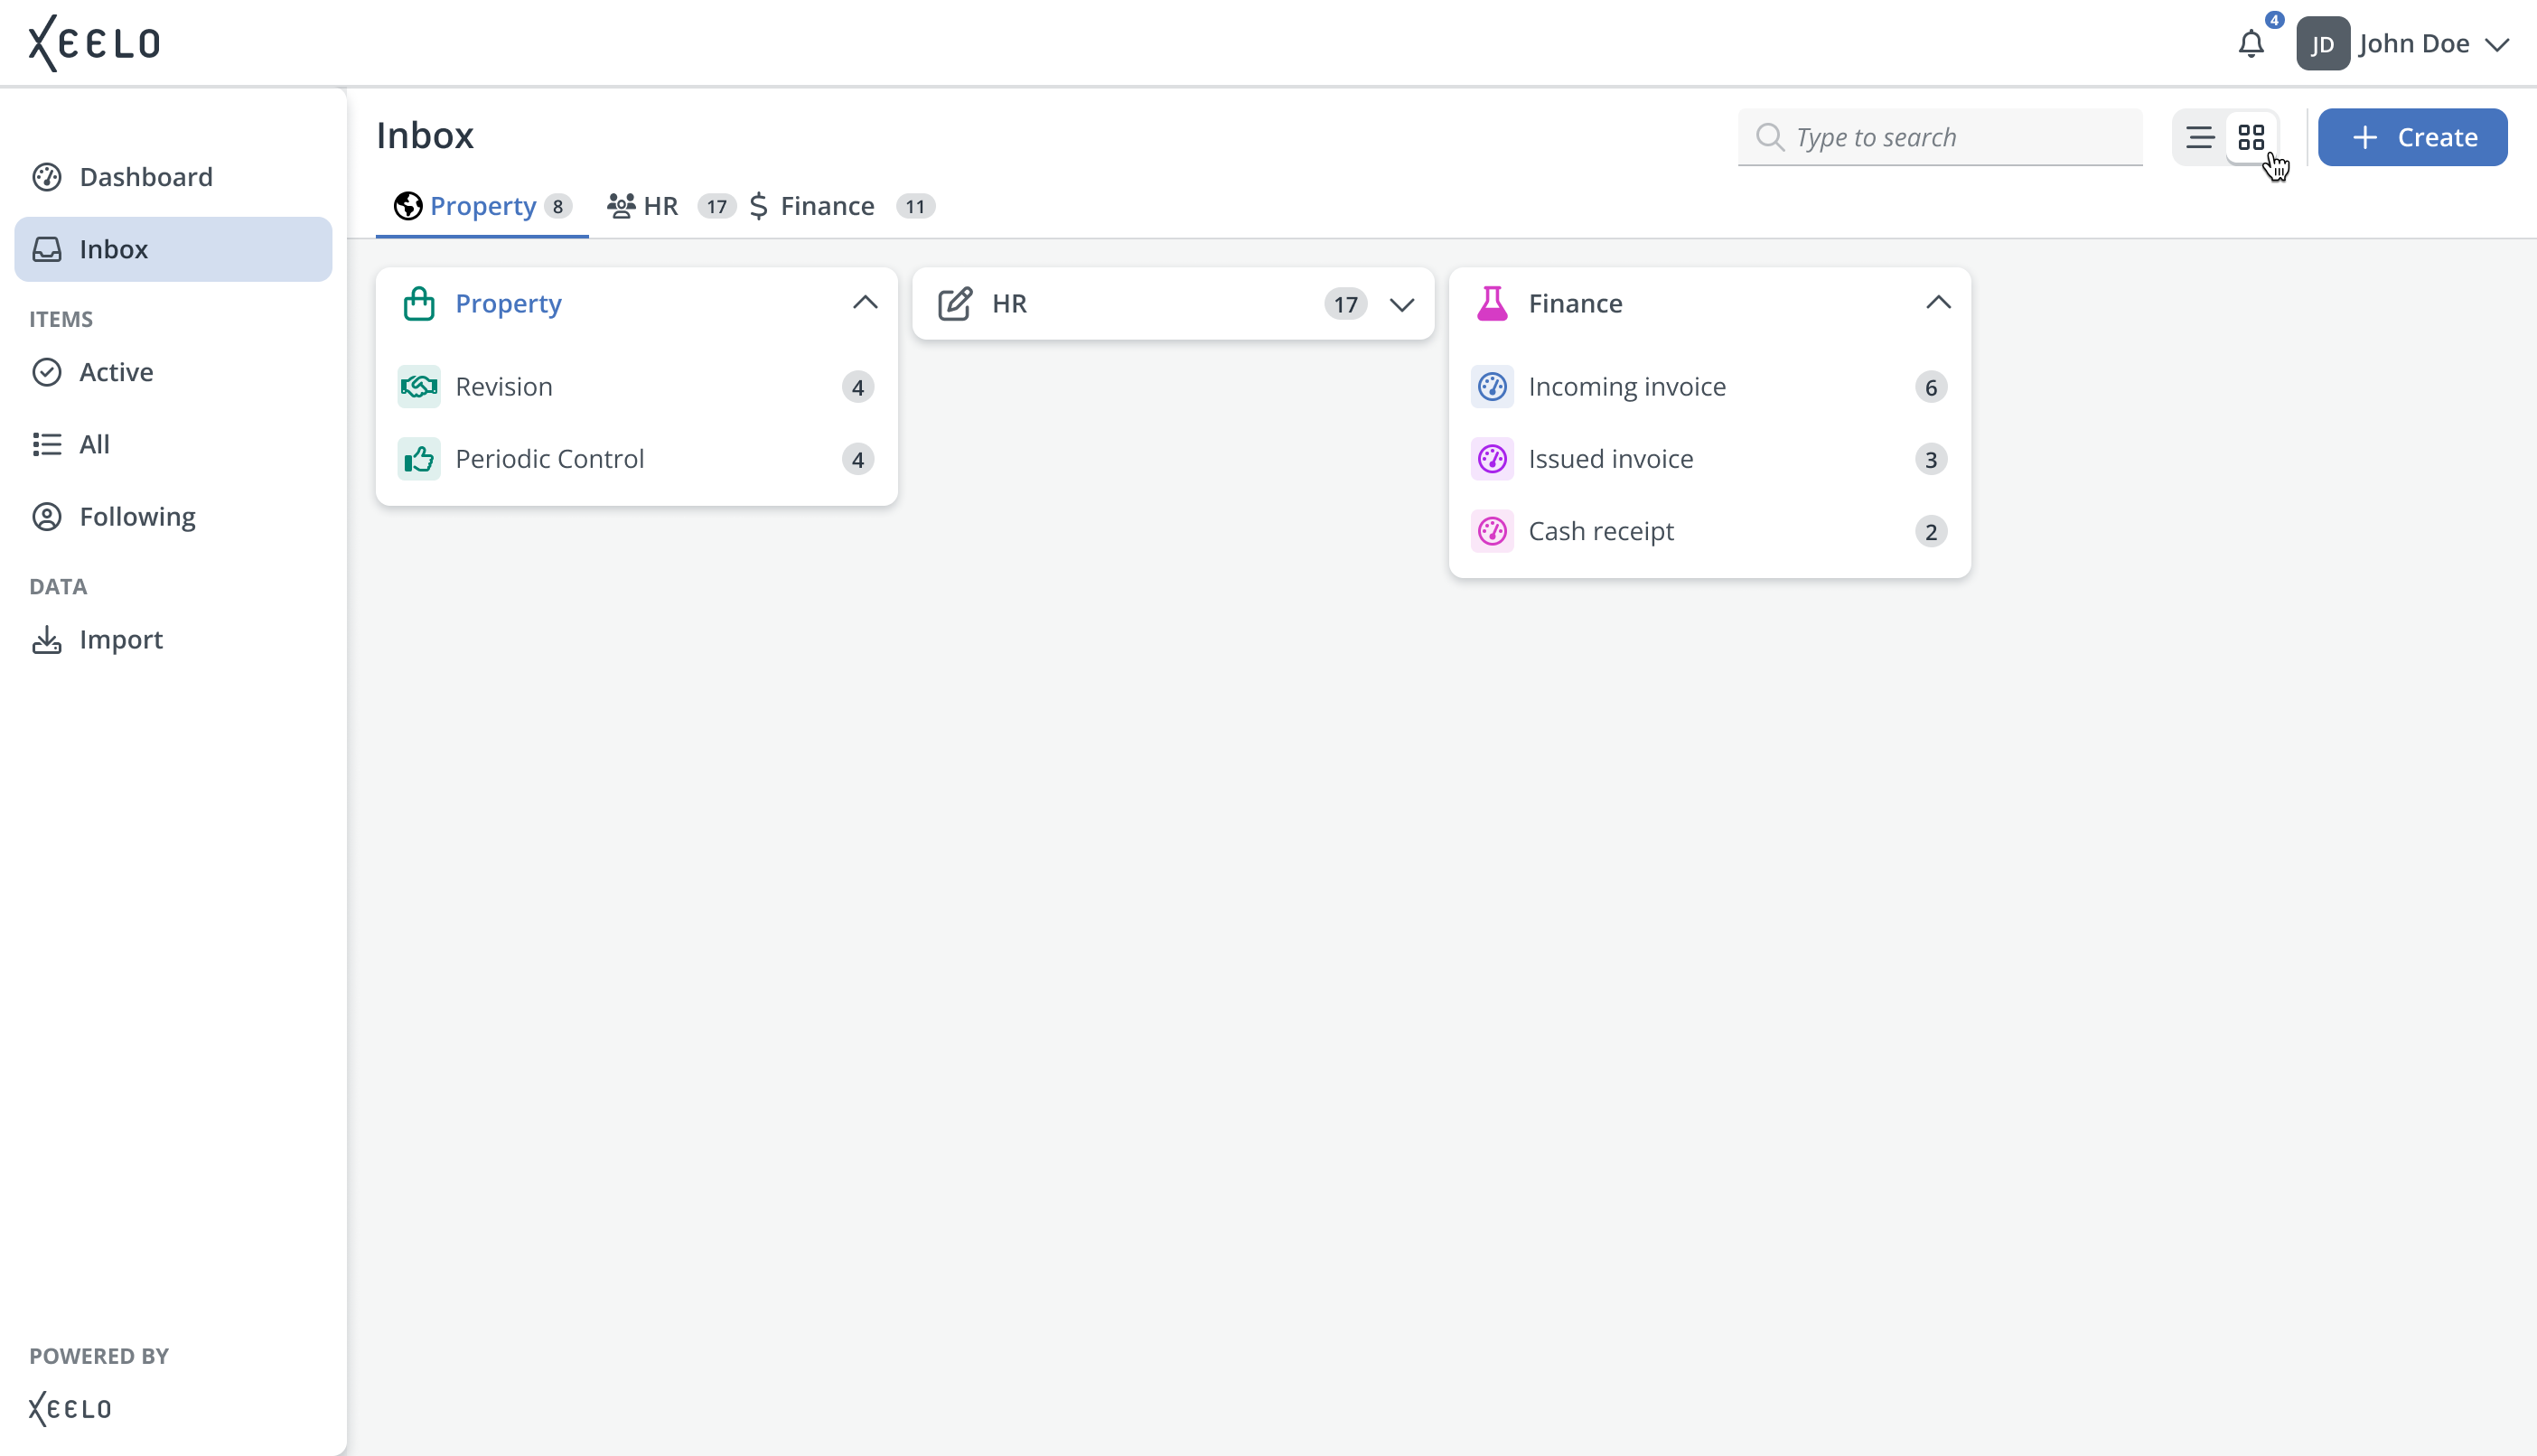
At the top, you’ll find tabs for individual companies. Unlike in list view, the All tab is not available here, so you always work within one specific company. Each tab shows a badge with the number of active requests currently assigned to you.
Below the tabs, you’ll see cards representing object types. You can expand or collapse them depending on how much detail you need. When expanded, the card displays objects with the number of assigned items. Clicking an object opens the full list of its requests.
The card view also includes a search field. As soon as you start typing, the system filters object types and objects, showing only the companies that contain the searched term.
Request actions
Inbox isn not just a passive list of requests. You can work with them directly from the overview — whether you want to quickly process a single request or perform a bulk action on multiple items. This saves time and removes the need to constantly open request details.
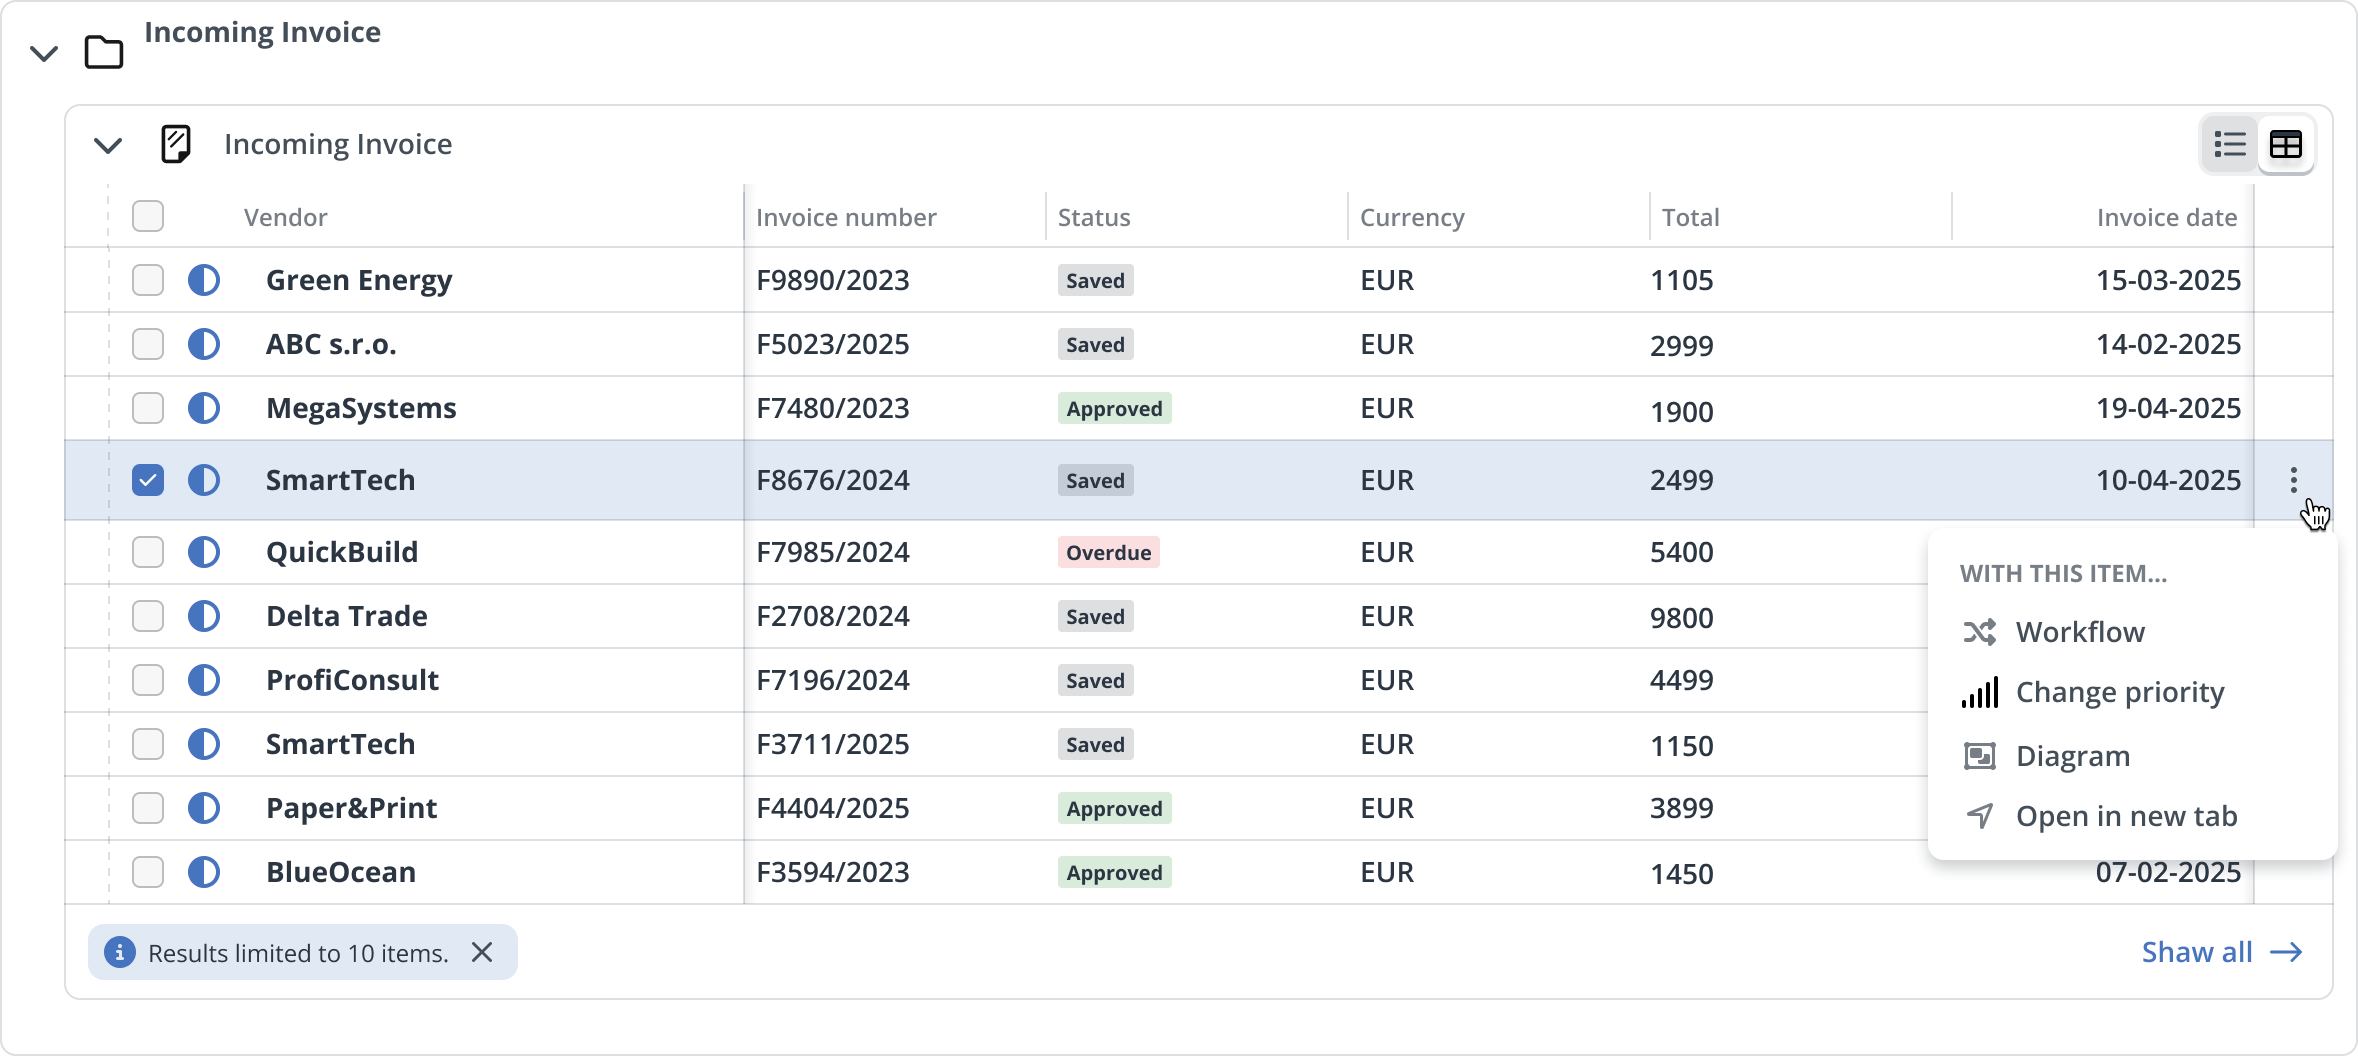
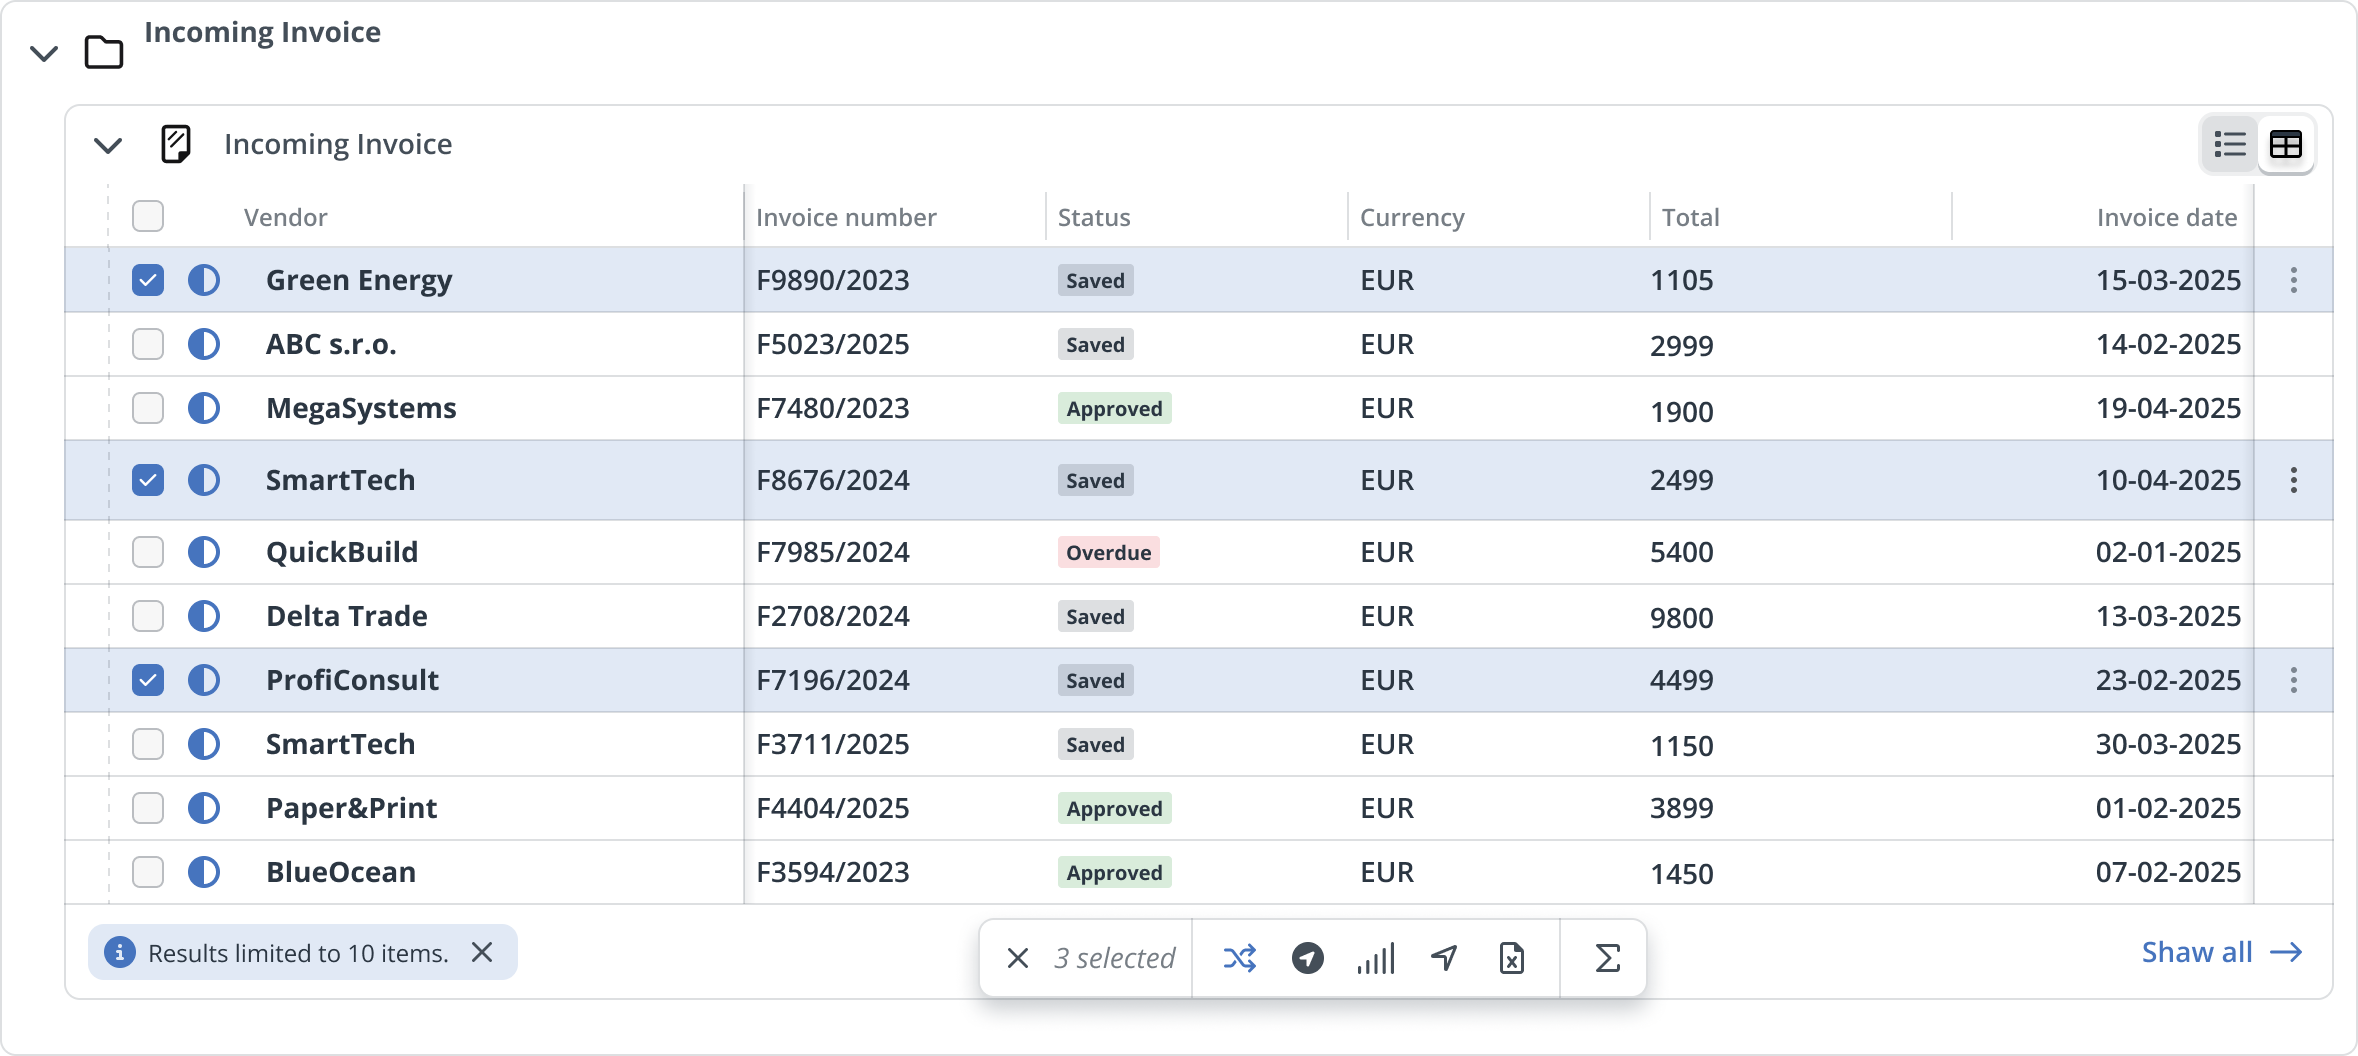
Each row in the list represents a specific request. You can handle them in two ways: in bulk, or individually.
At the start of each row, you’ll find a checkbox. When you select one, the toolbar automatically appears with a set of bulk actions. With it, you can quickly change priority, export data to Excel, or open selected requests in a queue or new tab.
Note
The toolbar works only within a single object. If you select a request in one object, the checkboxes in other objects become disabled. This ensures you don’t accidentally run bulk actions across multiple objects.
In the Inbox, the toolbar also includes the Workflow action. It lets you move selected requests to the next process step directly from the overview, without opening details. This is especially useful when for example approving a larger batch of invoices.
The Workflow action appears only if the administrator has enabled it, and all selected requests must be in the same state so they can be moved together. You can find full details about toolbar actions here.
If you want to work with just a single request, use the three-dot menu at the end of the row. This menu gives you actions for that specific item, such as opening in a new tab, displaying the workflow diagram, or changing its priority. The exact options depend on your system configuration. Learn more about row actions here.
Request display options
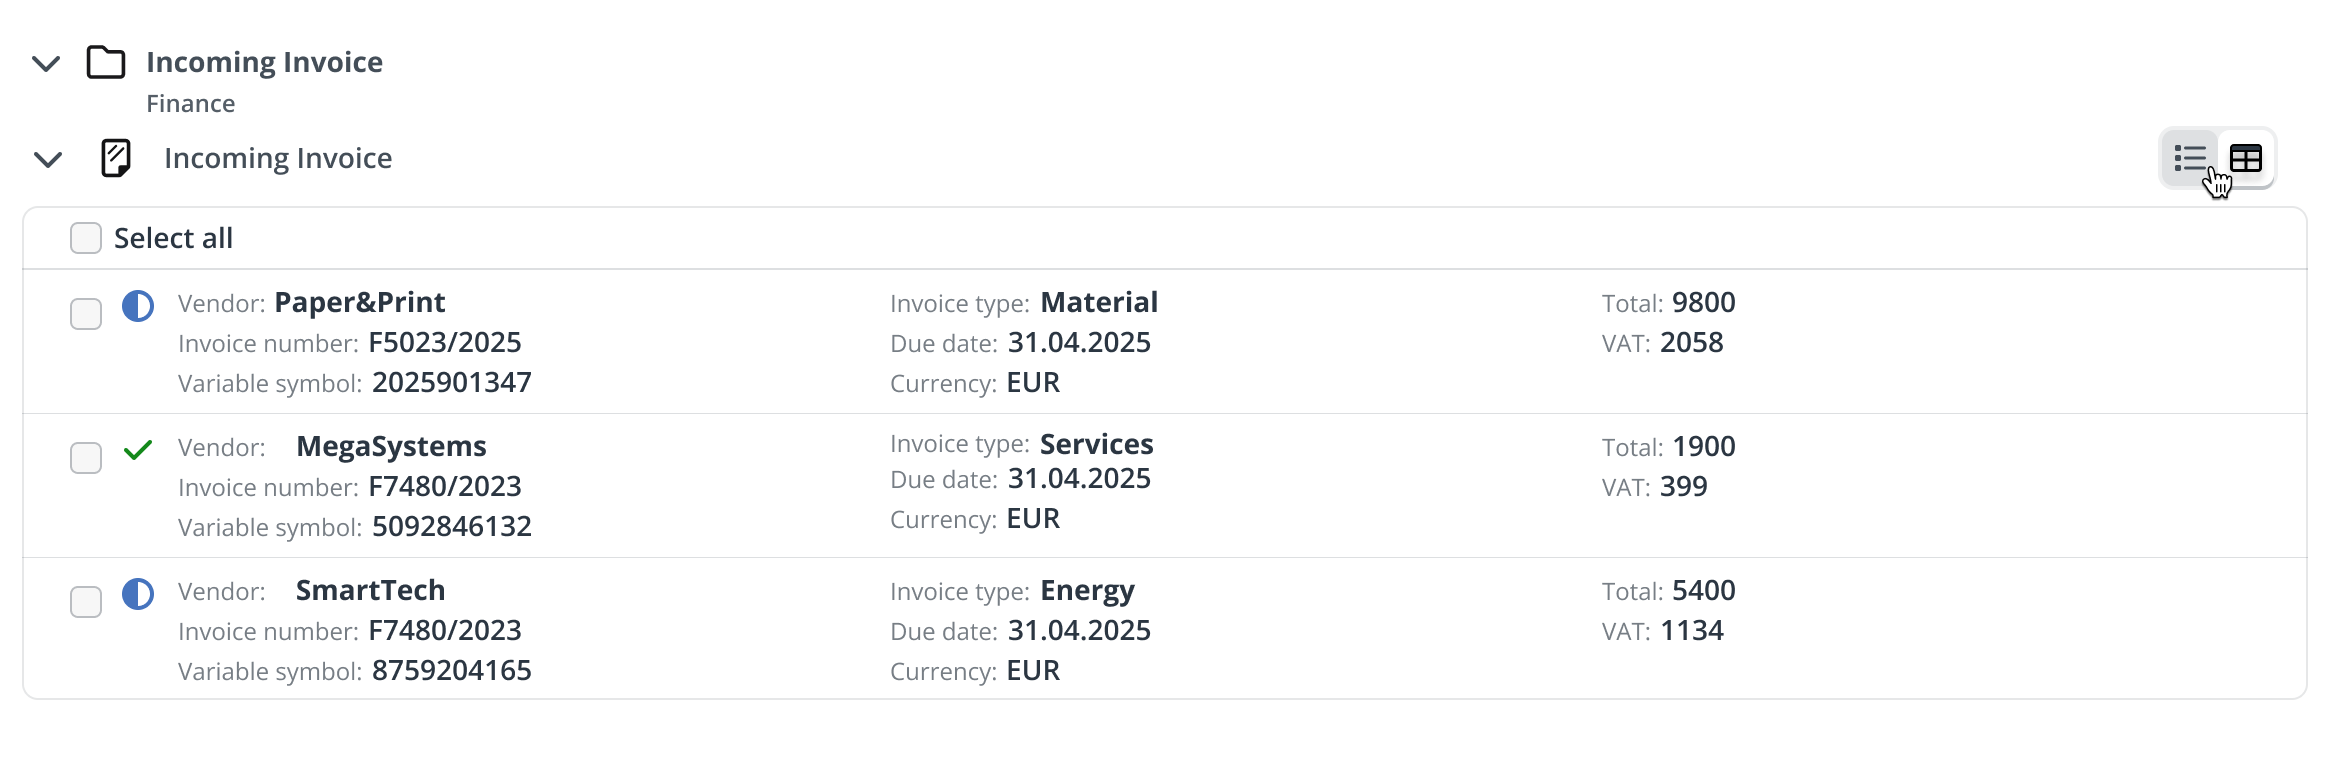
You can choose how requests are displayed. Two modes are available—grid view and table view. Switch between them using the icons in the top right corner of each object.
- Grid view is more compact and focuses on quick orientation. It highlights key information for each request so you can immediately see what matters and what requires your attention. This mode is ideal for everyday operational work when you want to quickly scan and move on.
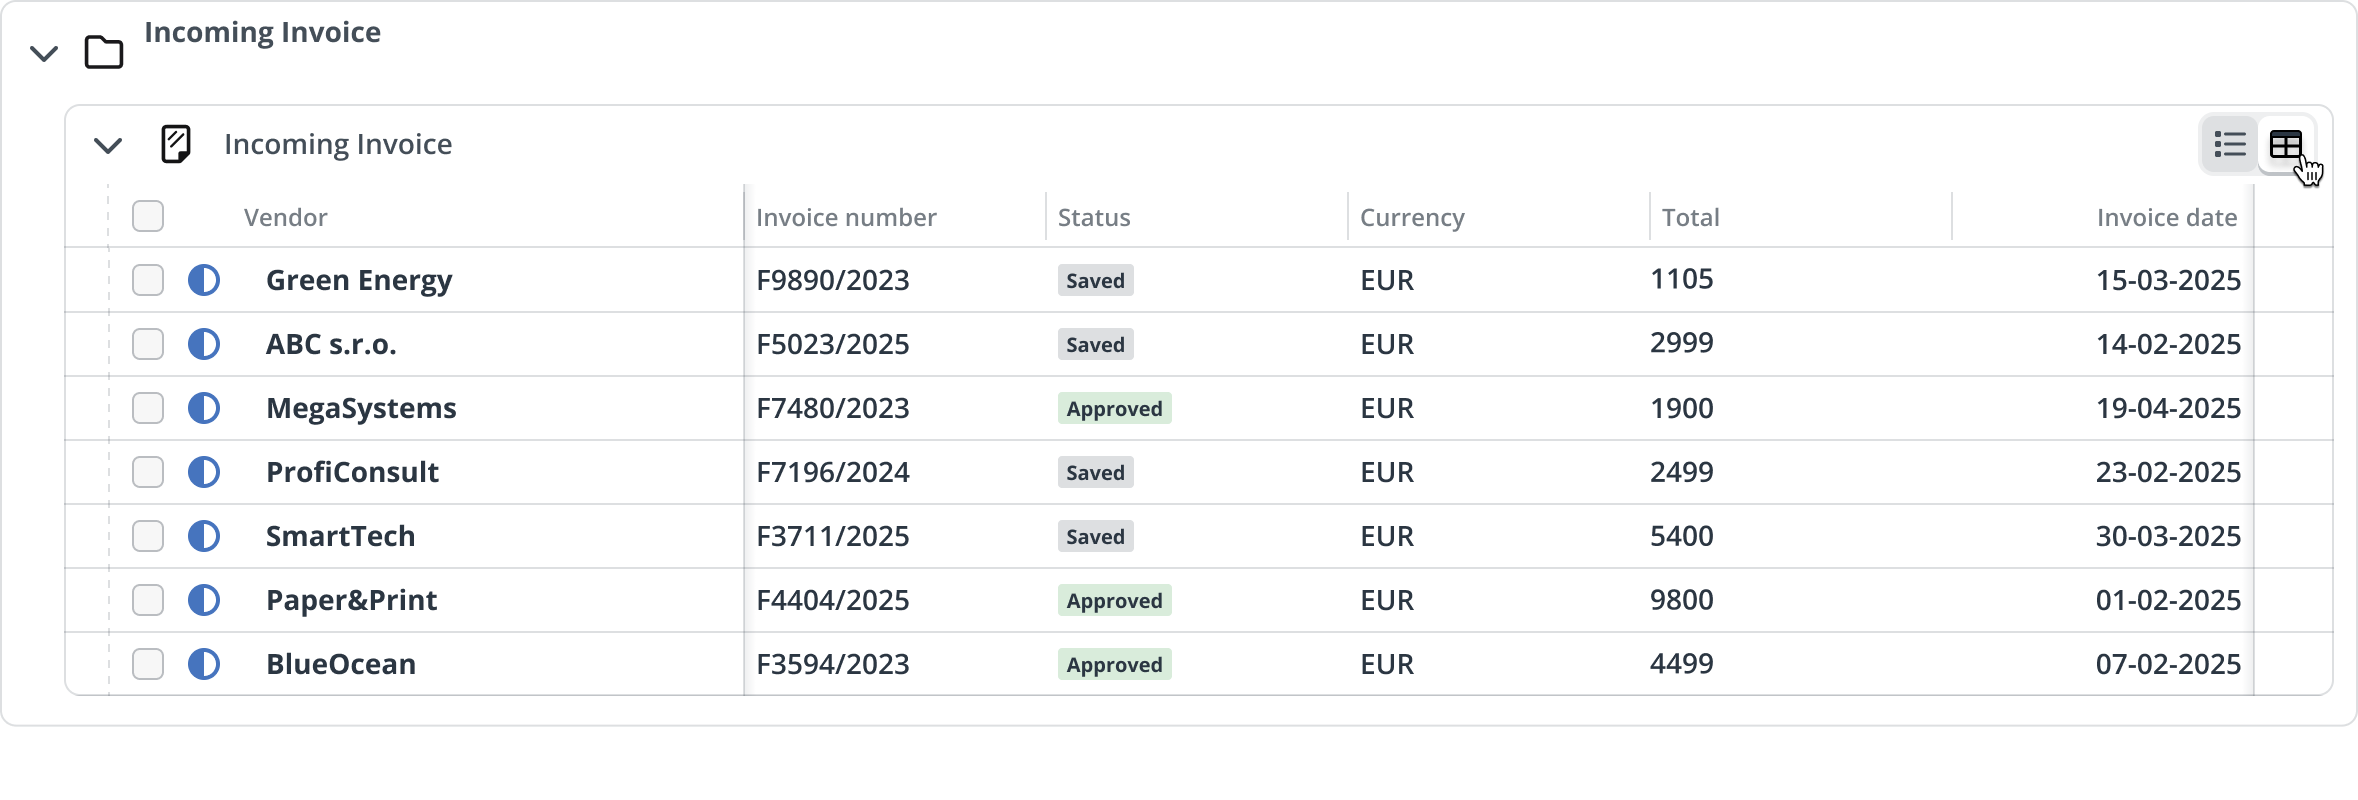
- Table view resembles Excel. It’s suitable when you work with a larger amount of data and need more options for analysis. This mode offers more flexibility and is especially useful for bigger lists.
Work efficiently
- Start your day in the Assigned overview – it shows all tasks waiting for your action.
- Select multiple requests at once and use bulk actions – save dozens of clicks.
- Use row actions to handle individual requests quickly, without opening details.
- Run Workflow directly from the toolbar when you want to move multiple items forward in one step.